In our desire to update the furniture in the living room, we decided not to take the easy route. We needed a shelf that could be used for growing seedlings and, in the off-season, as decorative and stylish furniture for decor, books, houseplants, etc.
We monitored all the ready-made options offered by furniture stores and realized that what we wanted could be made by ourselves, which would be cheaper, faster, and more practical. So, we share our own experience.
Stage 1: Planning
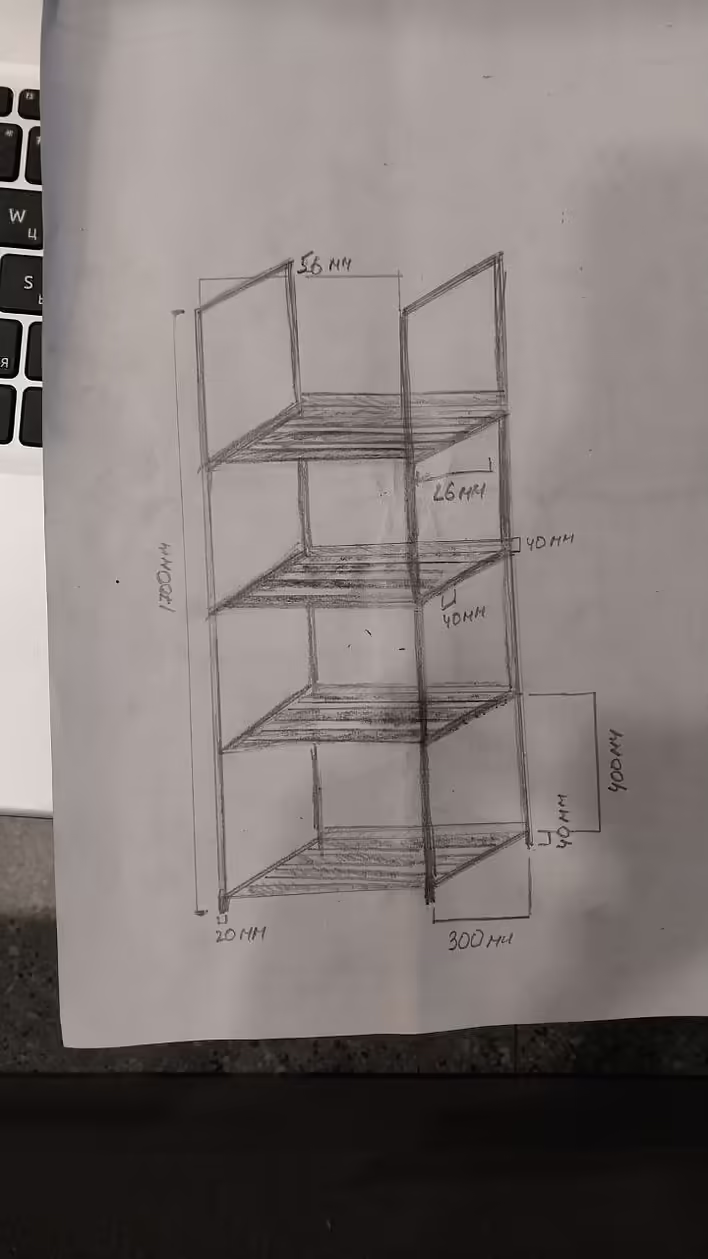
We started with a sheet of paper and a pencil, simply drawing what we needed.
Попередній малюнок
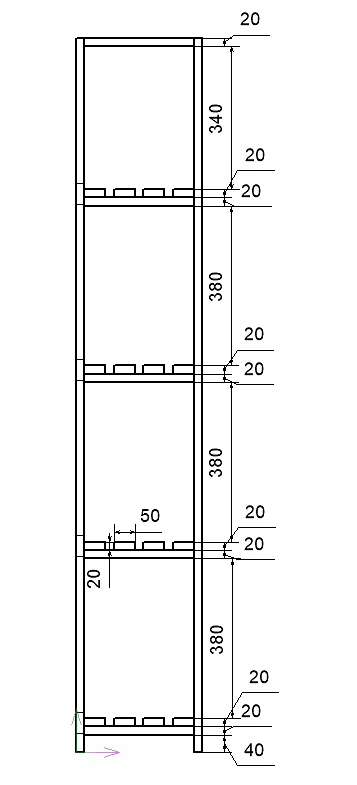
Then the drawing began to accumulate the necessary dimensions and details, which allowed us to calculate the list of materials and their quantity.
Spoiler: A good friend who designs furniture helped us with the drawings of the ready-made shelf. Huge thanks to him for that ;)
As a result, to make the shelf according to our parameters, we needed:
Materials:
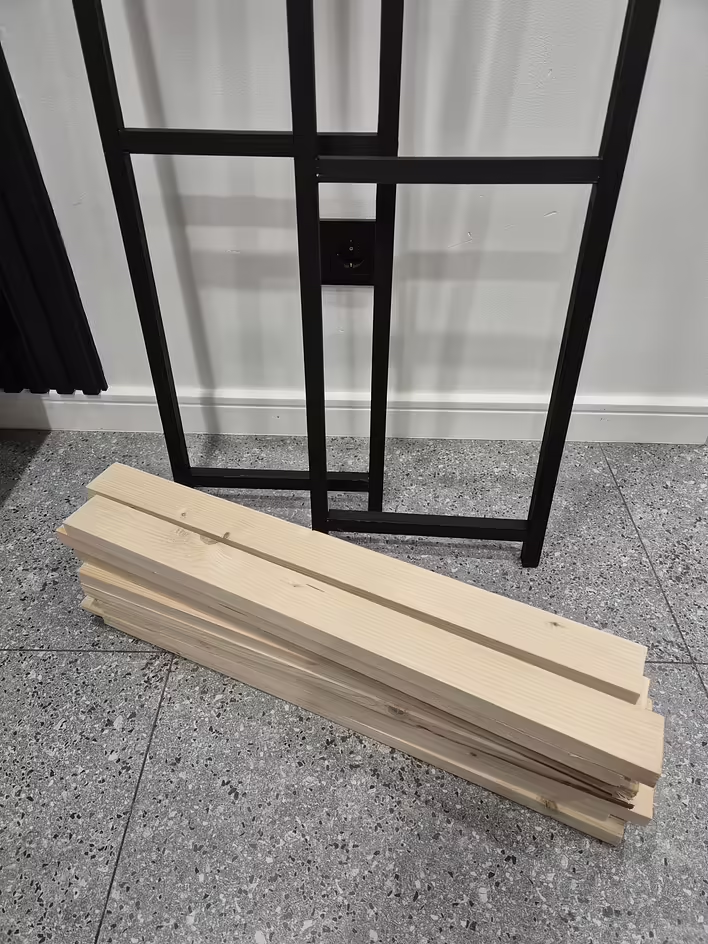
beam 20×20 mm – 12 m (for the frame elements, painted black)
slat 20×50 mm – 9.6 m (for the shelves)
slat 20×40 mm – 2.3 m (for the cross braces)
self-tapping screws 3.5 mm – 100 pcs (with a margin)
black rubber paint 1 l
From our own experience, we recommend taking wood materials with a small margin. When cutting the details, there may always be a few centimeters short. The margin won't strain your pockets.
Tools and consumables:
jigsaw or saw (we used an electric jigsaw)
screwdriver
wood drill 2 mm
sanding machine with a round base (optional)
sanding discs for wood with a grain from 120 to 240 (optional, if the wood is not sanded)
Stage 2: Cutting the Details
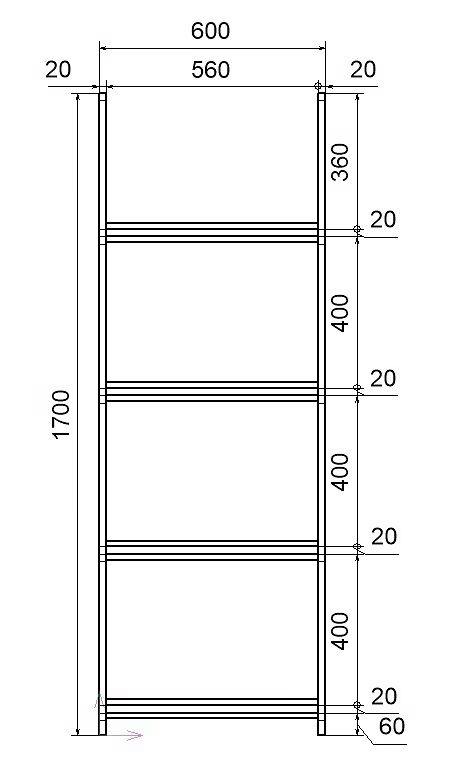
For the main frame, we used a beam of 20×20 mm. To make it, we need to cut:
4 × strips of 170 cm
10 × strips of 26 cm
For the shelves, we need to cut 16 elements of 60 cm in length from slats of 20×50 mm.
For the cross braces, we need to cut 4 elements of 26 cm in length from slats of 20×40 mm.
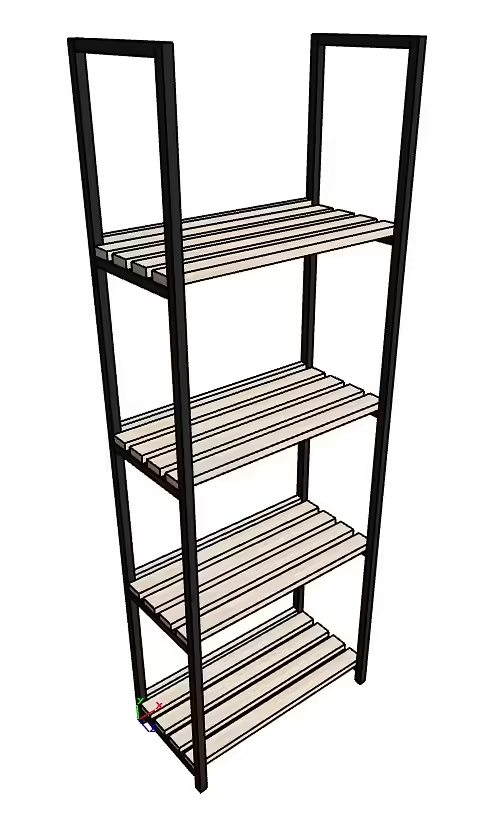
Stage 3: Assembling the Frame and Painting
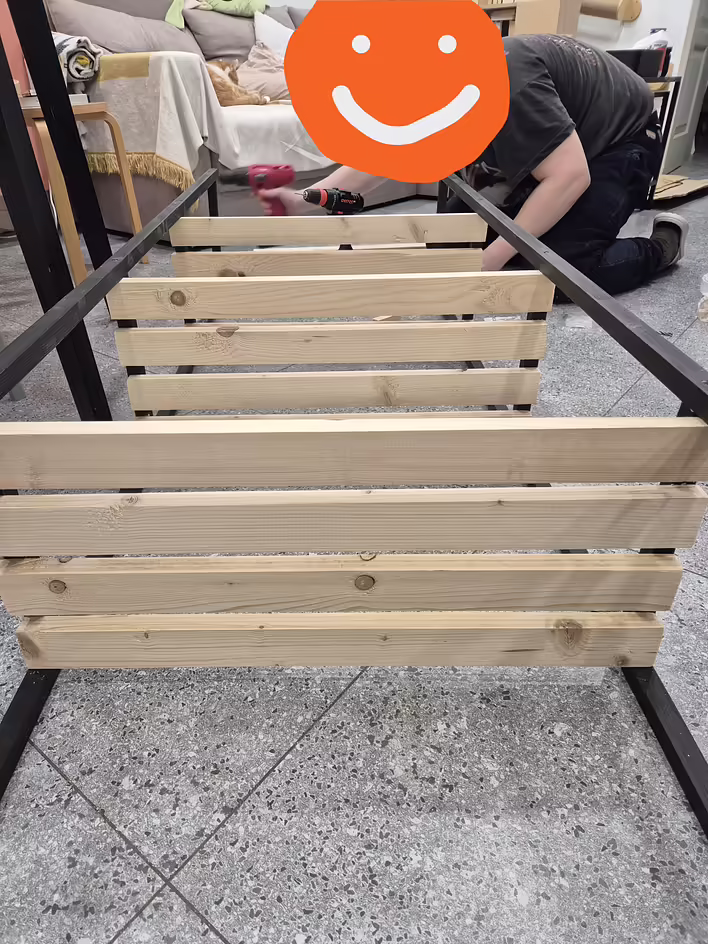
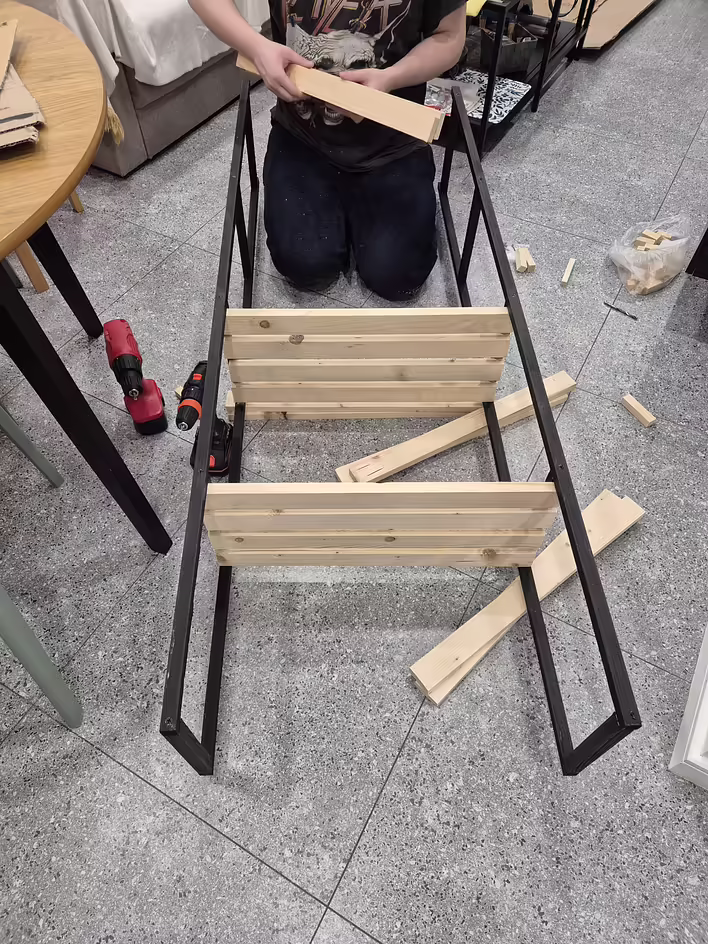
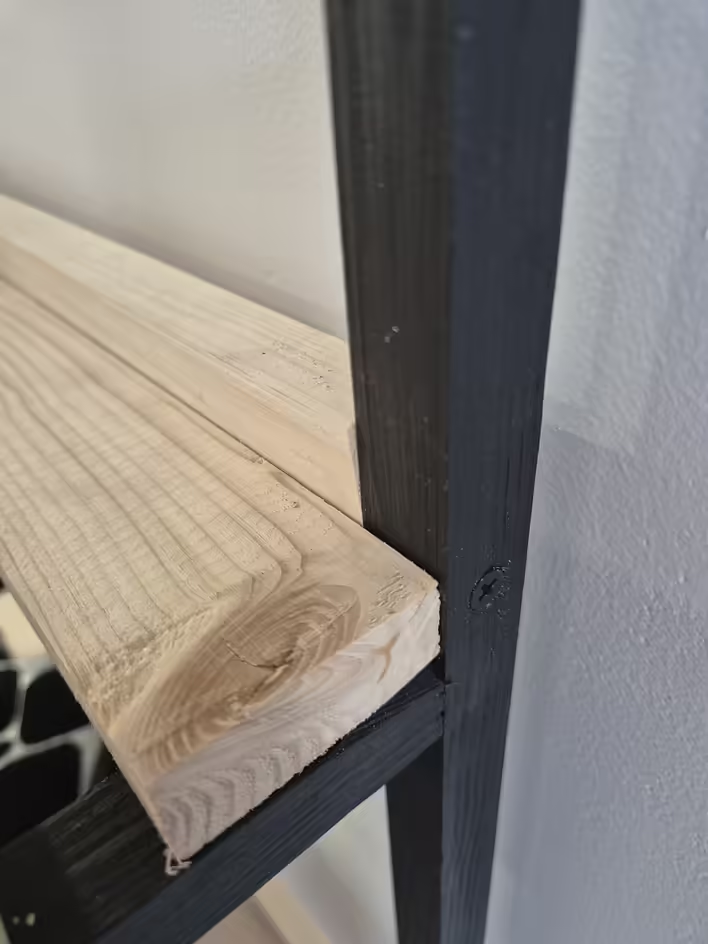
We assemble the side elements of the frame from the prepared details of the beam 20×20 mm. We fasten them with self-tapping screws according to the drawing and photo. To avoid splitting the wood, we drill pilot holes before screwing in the self-tapping screws.
After assembling the frame, we paint it with black rubber paint. It dries quite quickly (no more than two hours).
Stage 4: Installing the Shelves and Braces
The slats 20×50 mm were not sanded to perfection, so we had to bring in the "heavy artillery" in the form of a sanding machine. Once we removed all the knots and splinters, we could proceed to install the shelves.
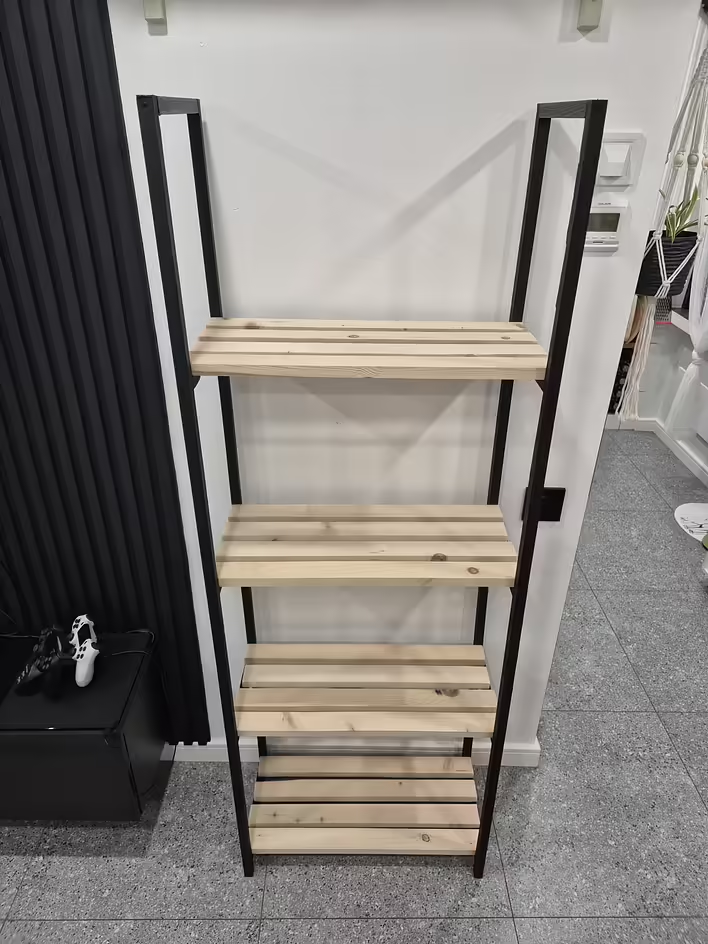
Our shelf has 4 full-fledged shelves. The first starts at a height of 4 cm from the base. The height of each is 40 cm. The top one is open (that was our idea). We attach the slats with self-tapping screws from below for an aesthetic look of the shelves. And we also drill a pilot hole first.
The final stage is to add cross braces from the slat 20×50 mm. We fasten them similarly to the other elements of the shelf. Since they protrude 1 cm above the shelf, they will also serve as a kind of limiter.
The shelves can be covered with varnish, aquacolor, or any paint of any other color.
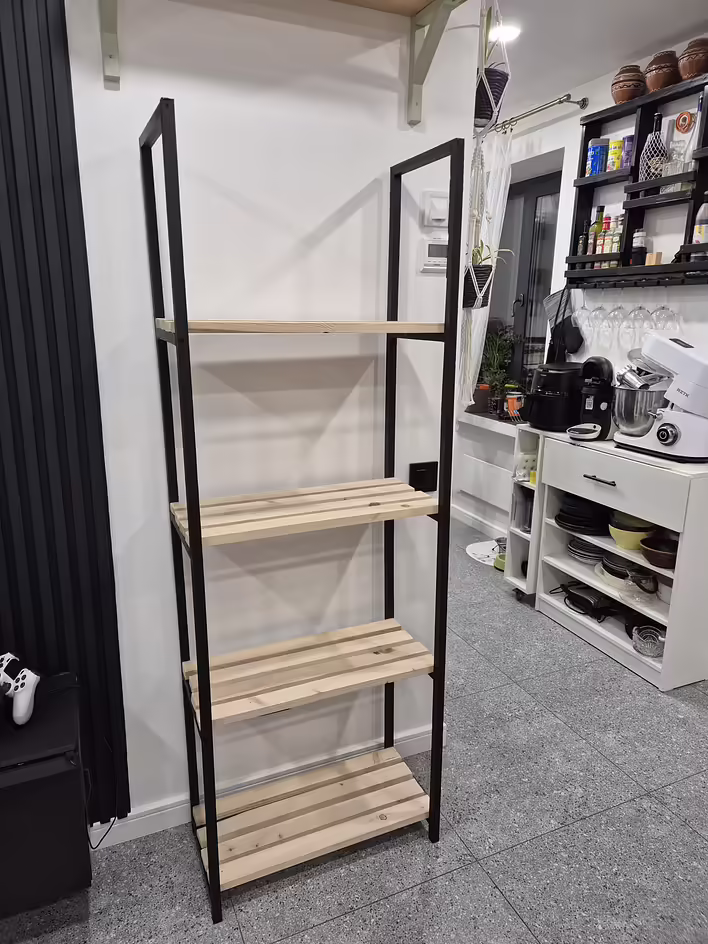
The shelf turned out to be sturdy, easy to assemble, and functional. Thanks to its simple design, it can be adapted to various needs. We hope our experience will be useful to you!