Our grandfather's apartment hasn't seen renovation for about 20 years. And when there is no time for major work, but you want to refresh the space quickly and not spend all your money – Pinterest comes to the rescue. The ideas that inspired us are being brought to life with maximum pragmatism.
So, we decided to use self-adhesive panels for the walls and floor, paint the ceiling and part of the wall with water-based paint, make small shelves, and add a few bright accents.
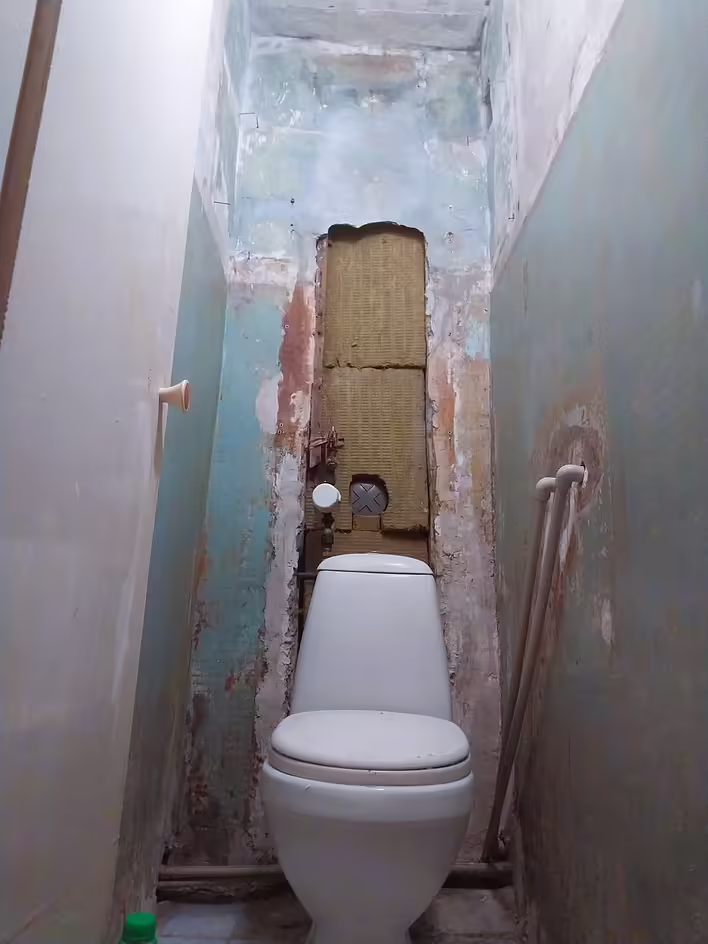
Demolition
First, we tore off the old wallpaper, removed the homemade wardrobe, and unscrewed the panels for access to the sewage pipes.
демонтаж шпалер, старої навісної шафи, панелей доступу до комунікацій
Preparing the Walls
Since there were remnants of glue and previous paint on the walls, it was decided to sand them with P80…P120 abrasive paper. After that, we treated the surfaces where we would glue the 3D panels with a brick pattern with primer (the consumption was about one liter).
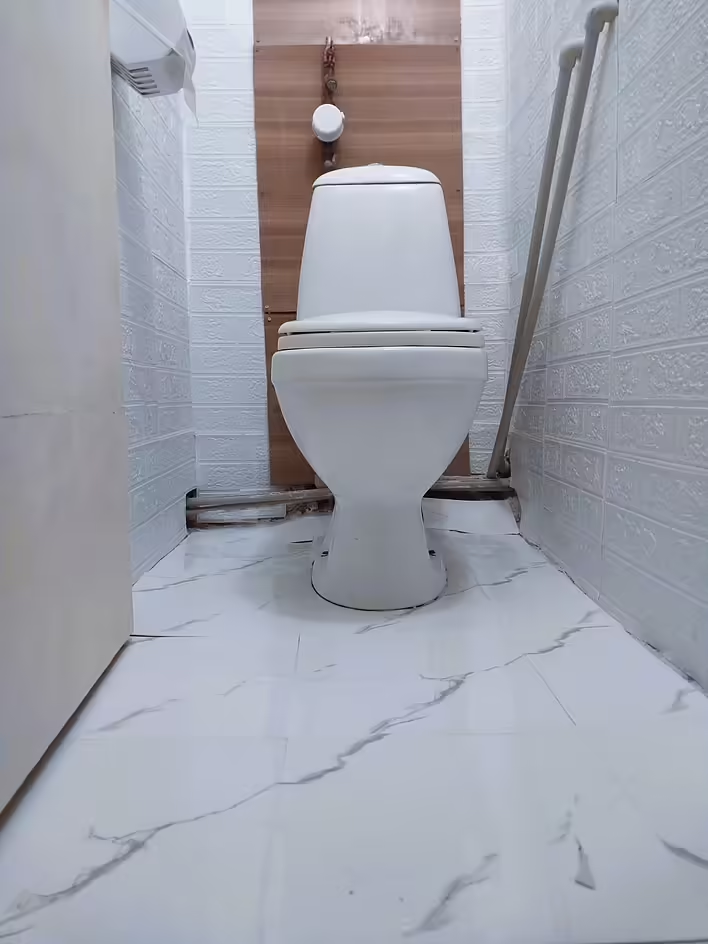
Painting the Ceiling and Part of the Wall
White color is always in trend. So, we chose it to visually brighten up the bathroom. We decided to use water-based paint for its ease of use, eco-friendliness, and quick drying. You can buy water-based paint for not all the money in the world XLINKSTARTX1X at the online store Vista. We needed two kilograms to cover the walls and ceiling in three layers to a perfectly white color. We applied the paint with a roller and used a brush for the corners and hard-to-reach places.
Gluing 3D Panels on the Walls
This was a revelation for us this year. The panels are 40 by 40 cm, with a very strong adhesive base – it's a genius thing. You can buy them at a conditional Epicenter, but we ordered them from the Chinese marketplace Temu. This is also a way to save money (and buy decent water-based paint, not all this unclear stuff))). The panels stick quickly; the main thing is to occasionally check with a square, ruler, and level to ensure they are not completely crooked.
Gluing Linoleum Tile Imitation on the Floor
Here we went the previous route and ordered a marble floor tile imitation from the Chinese. But soft, something like linoleum. It's an interesting and budget-friendly solution. The main thing before gluing is to wash the old covering very well. We also degreased the old tiles just in case.
підібрали +- відповідність по малюнку панелей
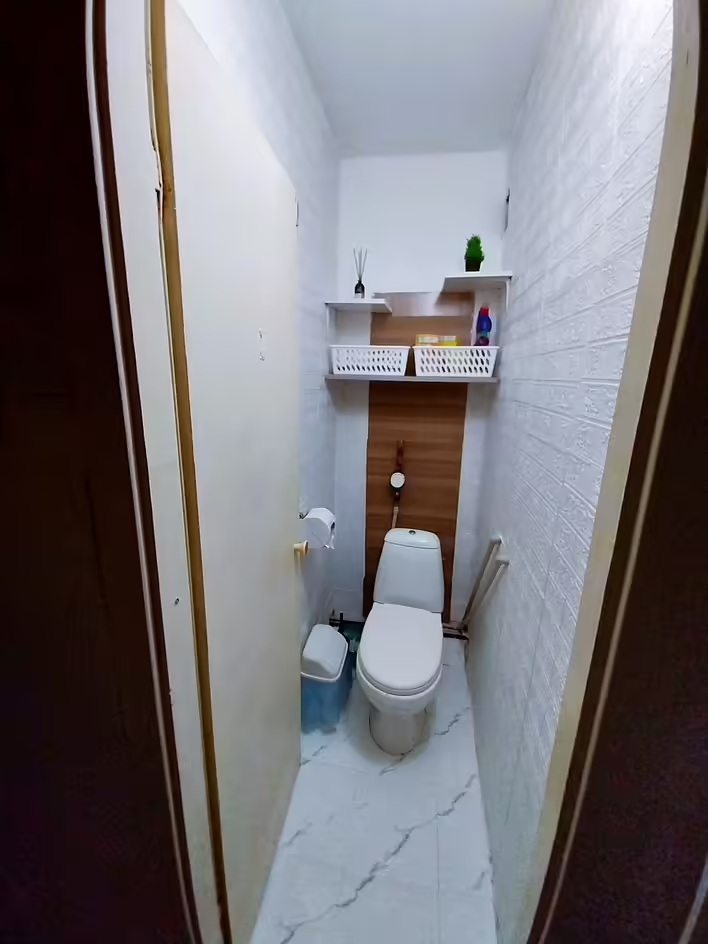
Attaching Shelves
After making a custom cabinet, we had 3 defective MDF boards left, from which we decided to make shelves. A handful of screws, 6 corner brackets – and the shelves are ready. We attach the wide one at chest level for quick access to everything necessary, and two small ones asymmetrically at different levels. We use them for decor.
Decorative Accents
An air freshener in the form of a bottle with rattan sticks and a pot with an artificial plant – these are the little things that set visual accents in our express renovation. We also bought a new white trash can and a black brush. We played with contrasts, so to speak.
As a Summary
The financial costs for such a cheap and quick renovation amounted to 2200 UAH. This is the cost of self-adhesive panels for the walls and floor, primer and water-based paint for the walls and ceiling, a handful of screws, shelf brackets, air freshener, artificial plant, bucket, and brush. The shelves were left after making the custom cabinet. Therefore, if using other materials, one could budget approximately 300-400 UAH.
The time spent amounted to five evenings, as we worked after work for about three to four hours. The result – a visually decent refresh of the bathroom's appearance, and happy grandparents.