Why artificial nails break even with expensive gel: it's all about architecture
Masters and clients often believe that if they use an expensive, "correct" material, follow the sequence and compatibility of bases, tops, and gels — the result will be perfect. This is mentioned in every course and every video: here’s the base, here’s the builder, this one doesn’t get along with that one. But there is one thing that is mentioned in passing, yet it determines whether the extension will last three weeks without chips and whether the nail will have that same "expensive" look from the side. This architecture — how the gel is distributed in space, not what brand it is.
You can take a premium builder and create nails that will break at the tip every few days. Or you can build a shape with a cheap but stable material that withstands everyday wear for months. The difference is not in the jar, but in the geometry.
Material is the foundation, not the house
To be honest right away: architecture starts with the material, and you cannot build a good shape with bad gel physically. If the gel is runny or "flows," the apex settles before polymerization — and no technique will save it. Therefore, at the core of architecture are always quality gels for nail extensions — dense and predictable in viscosity, holding their shape while you build it.
But this is where the role of the material ends. Gel is like construction concrete: it can be the best in the world, but if poured incorrectly, the structure will still crack. After that, it’s all about your hands and understanding of where exactly this material should be thicker, where thinner, and at what height the highest point should stand. This is what the rest of the article is about.
What is nail architecture in simple terms
The simplest way to imagine a nail is as an engineering structure — a bridge or an arch. In any bridge, there is a point that bears the main load, and there is a principle by which this load is distributed so that the structure does not break under its own weight. With an artificial nail, it’s the same: it constantly works against breaking — when you pick something up, fasten something, type. It’s not the "strong gel in general" that withstands this, but the correctly built shape.
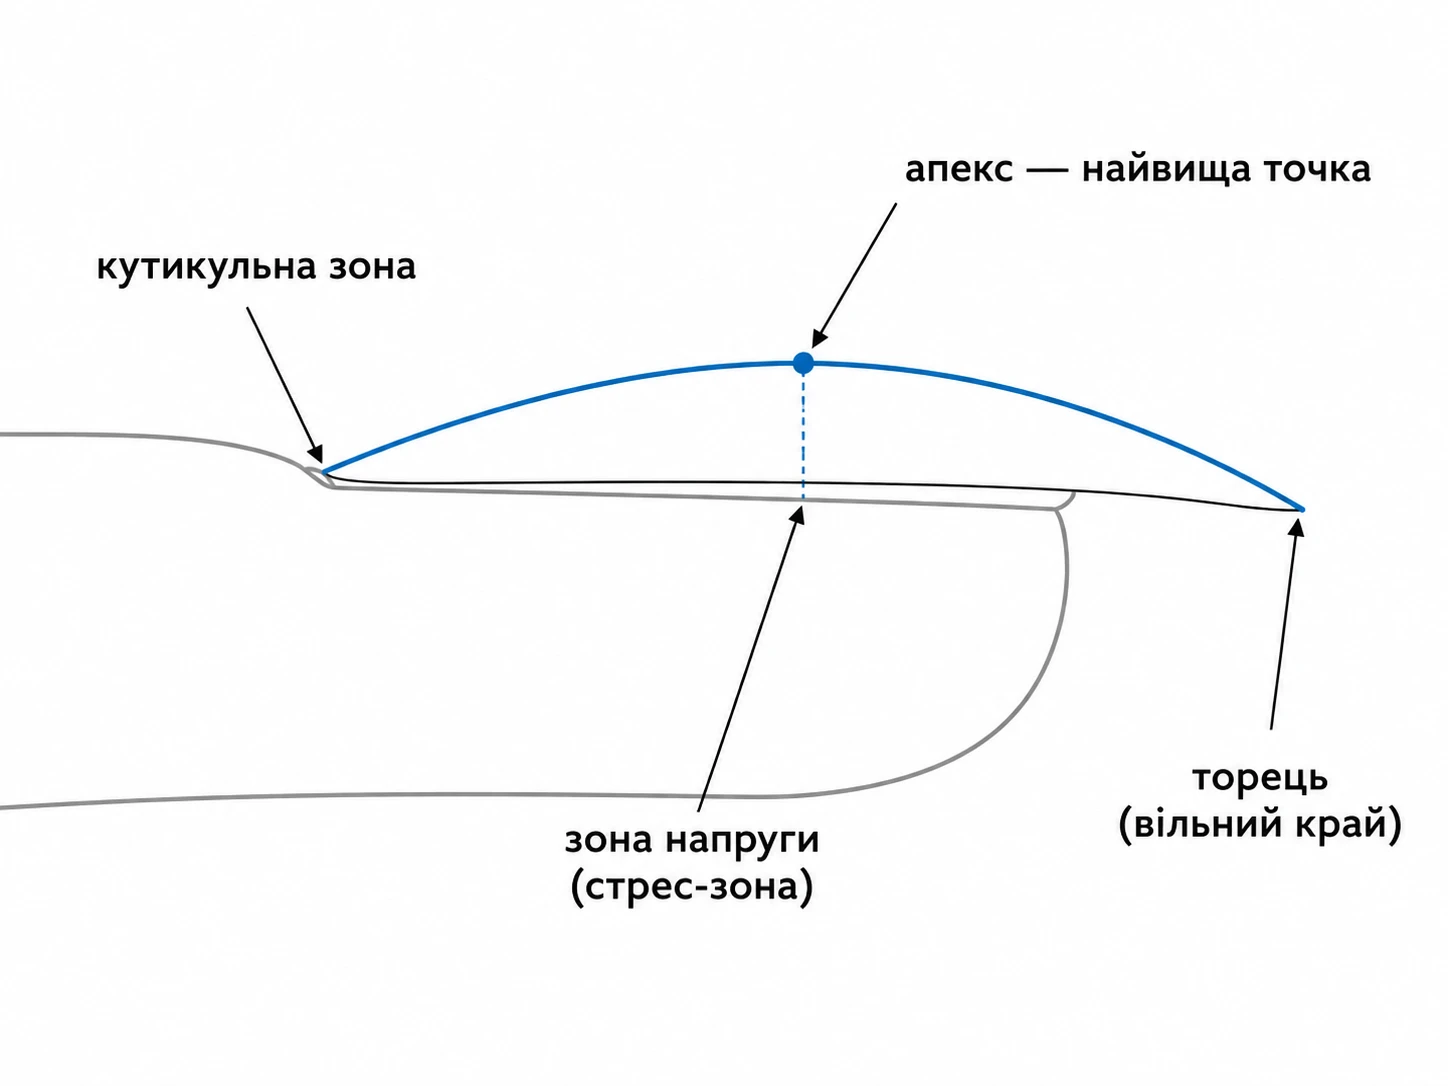
In this structure, there are several key elements that are worth understanding at the profile level — that is, when looking at the nail from the side (see Photo 1).
Apex — the highest point of the nail, its "spine of strength." It is not located in the middle or at the tip, but above the so-called stress zone — where the natural nail transitions to the free edge. If the apex is placed correctly, the load from the tip is distributed along the entire length and dampened. If the apex is shifted closer to the cuticle or not formed at all (made flat like a "ski") — all the force concentrates at one point, and the nail breaks right there.
Stress zone — the area transitioning from the natural nail to the extended part. This is the most vulnerable place in the entire structure, and this is where the architecture needs to be reinforced: sufficient, even thickness without "dips." Most breaks "out of nowhere" are due to an underdeveloped stress zone.
Tip (free edge) — the opposite side. Here, on the contrary, a proper thinning is needed: a massive, "heavy" tip acts as a lever and breaks off at the slightest impact. A thin but not brittle edge is a sign of well-calculated architecture.
Transverse arch and C-curve: what gives a "luxurious" look
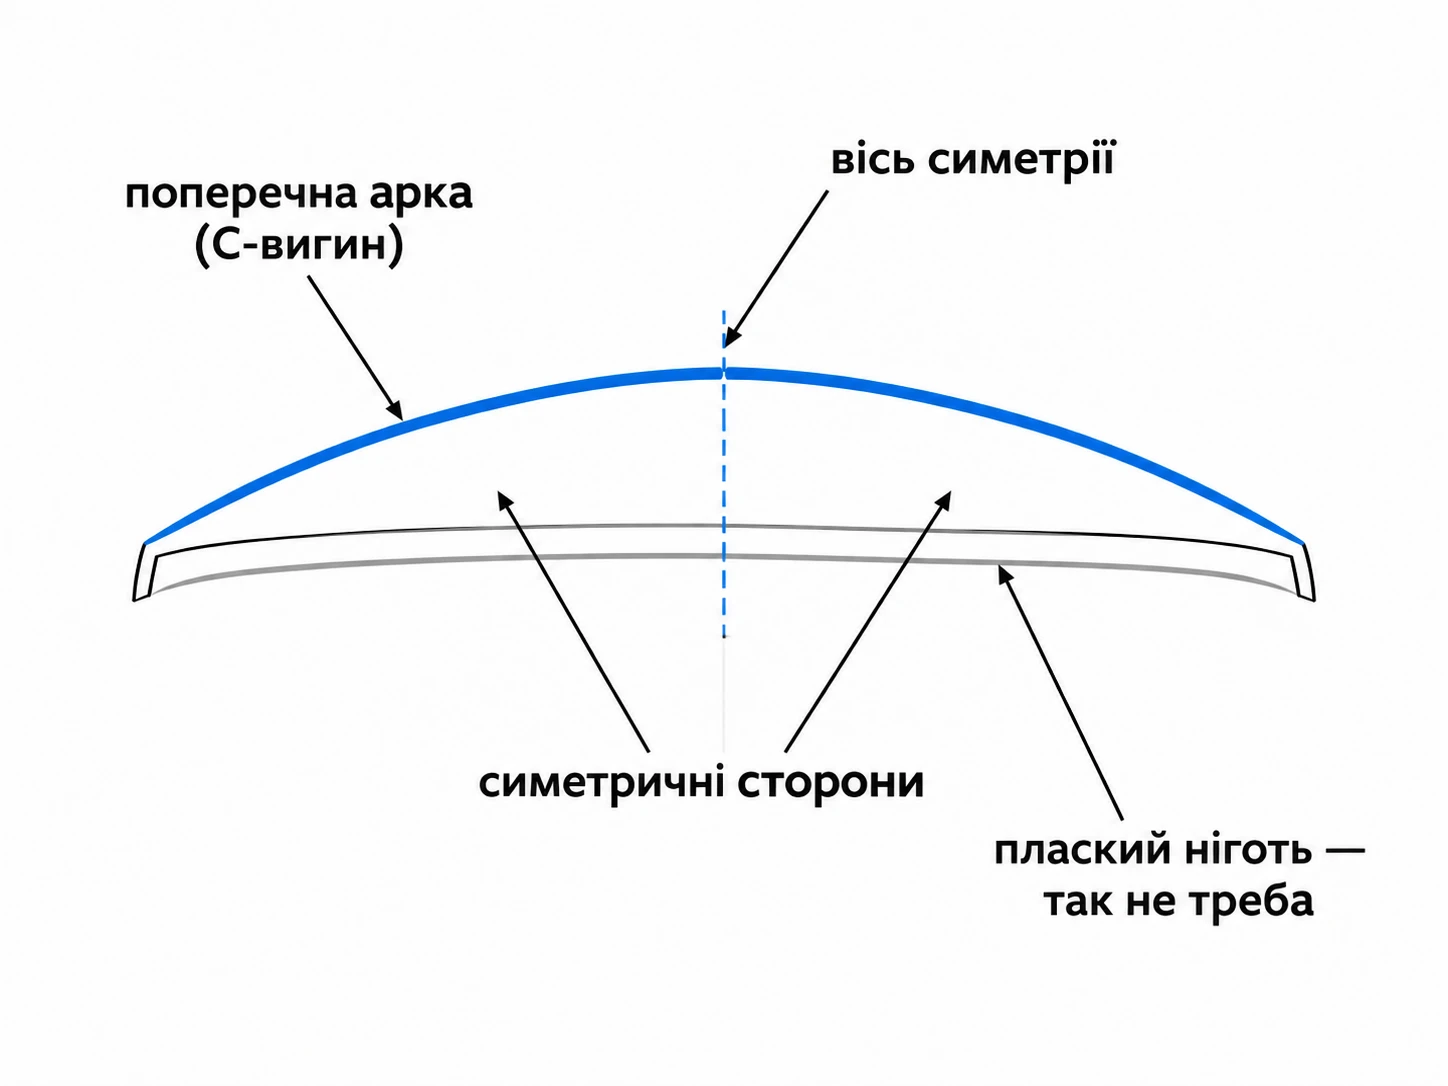
If the profile (Photo 1) is responsible for strength along the nail, then the transverse arch is responsible for strength across and for aesthetics. Look at the nail from the tip, as if peering into a tunnel (see Photo 2). A beautiful nail has an even, symmetrical curve — a C-curve. It works just like an arch: a structure with a curve can withstand many times more than a flat plate of the same thickness.
It is the symmetrical transverse arch that creates the "like from a magazine" effect that clients return for. Flat, "squashed" nails look cheap even with the neatest coating — because the eye perceives the lack of volume. Conversely, the correct C-curve visually narrows and elongates the fingers. It’s not just about strength — it’s about what clients are willing to pay more for.
Three typical architectural mistakes
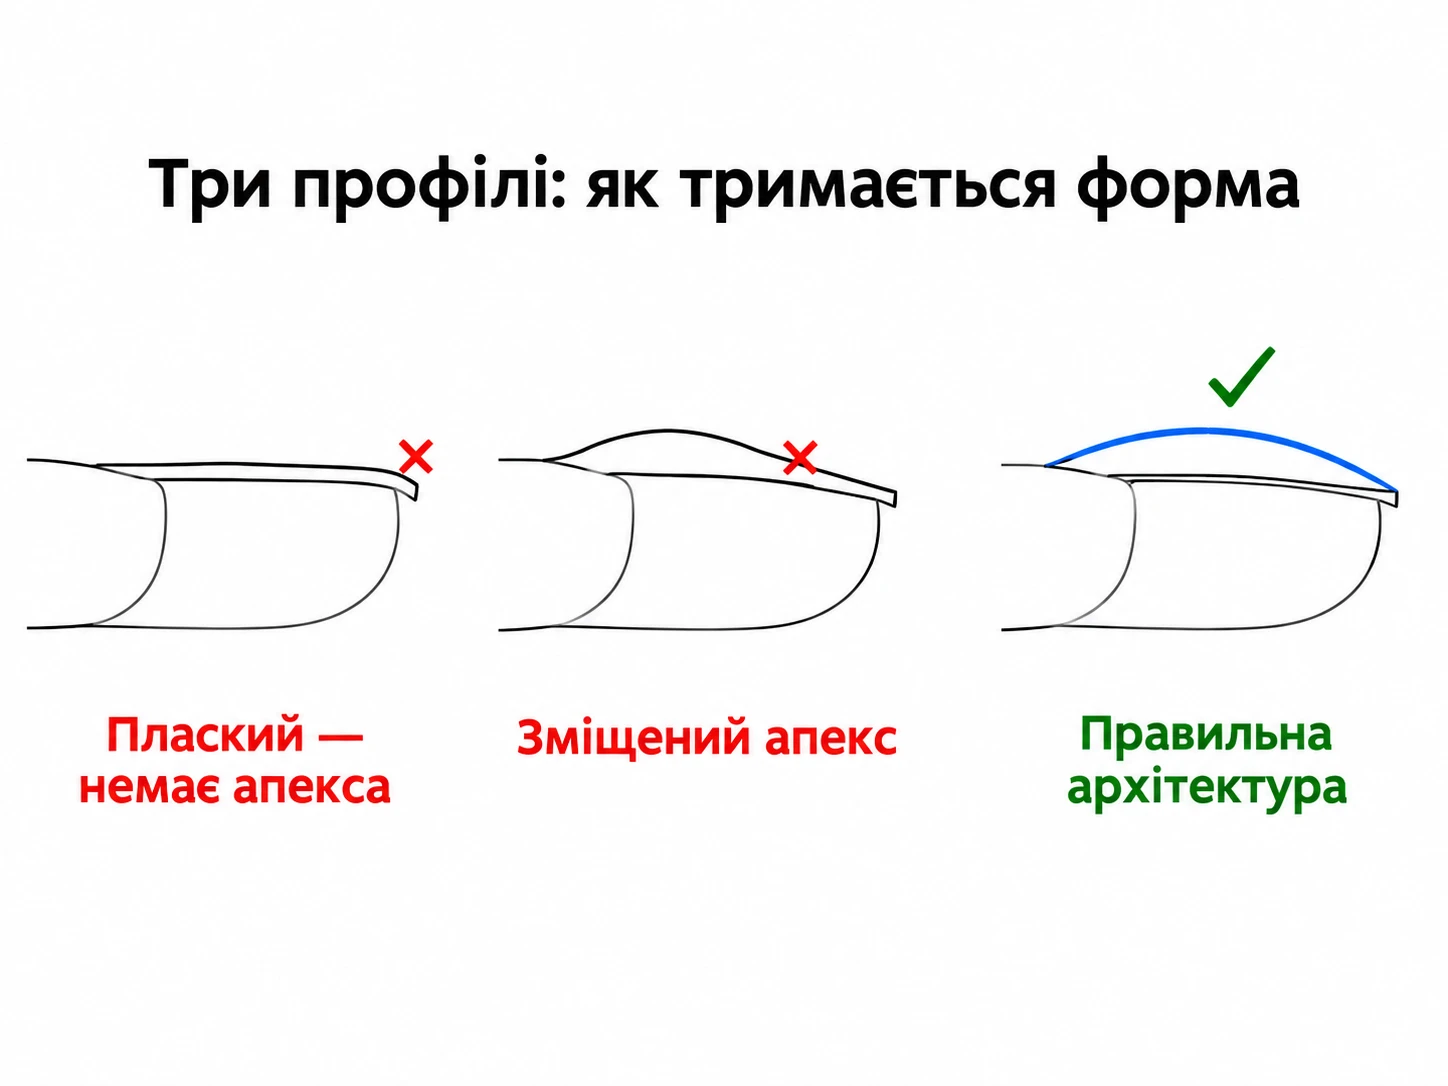
The difference is most clearly seen when placing a correct profile next to two "broken" ones (see Photo 3):
Flat nail without an apex. The material is distributed in an even layer, there is no highest point. It looks "meh" and breaks at the tip because there’s nowhere for the load to distribute.
Shifted apex. The highest point is too close to the cuticle. The nail appears "humped" at the base and thin at the end — and cracks in the stress zone.
Overloaded tip. Too much material at the free edge, the lever works against you — chips at the tip become regular.
The correct option is a smooth "apple" with the apex above the stress zone, a symmetrical transverse arch, and thinning towards the cuticle and tip. The same gel behaves completely differently in these four cases — and that’s the essence of it all.
Why this works: a bit of anatomy
The entire logic of architecture is not invented by masters "for beauty" — it replicates the structure of the natural nail. The natural nail plate itself has a longitudinal and transverse curve, an area where it attaches to the bed, and a free edge that works against breaking. Extensions essentially only reinforce and extend this natural geometry — that’s why they hold when done correctly and are rejected by the shape when they go against it.
If you want to delve deeper, it’s worth looking at how the nail plate is structured from a dermatological perspective — what zones it consists of and how it attaches to the bed. A visual diagram of the nail structure (plate, bed, matrix, free edge) can be found in the dermatological guide DermNet. When you see what the natural nail consists of and how it holds on the finger, it becomes clearer why the apex should be positioned exactly above the stress zone, and not elsewhere — you are simply working with the laws that are already embedded in the nail itself.
Conclusion
Material, sequence, and compatibility are the necessary foundation without which nothing will work. But this is just the foundation, not a guarantee of results. Whether the nail will be strong and beautiful is determined by the architecture: correctly placed apex, reinforced stress zone, symmetrical C-curve, and proper thinning to the edges. Learn to "see" the nail in profile and from the tip — and the same gel in your hands will start to yield a completely different result.