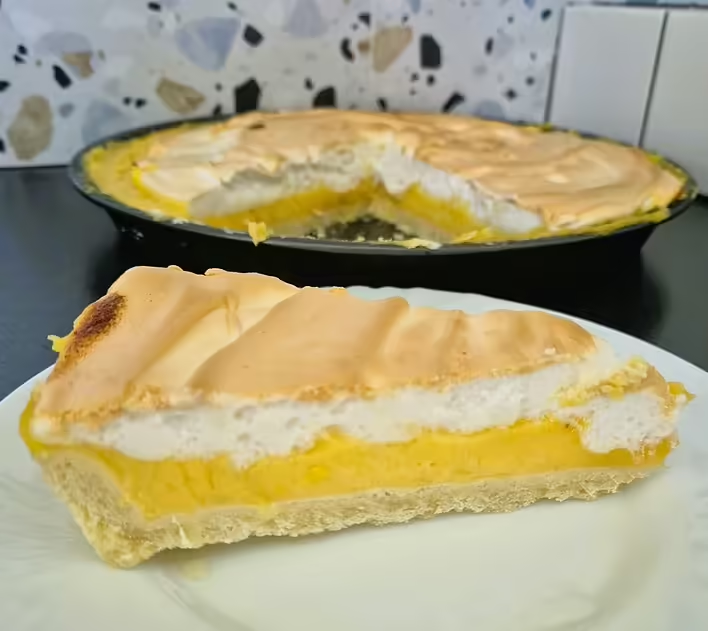
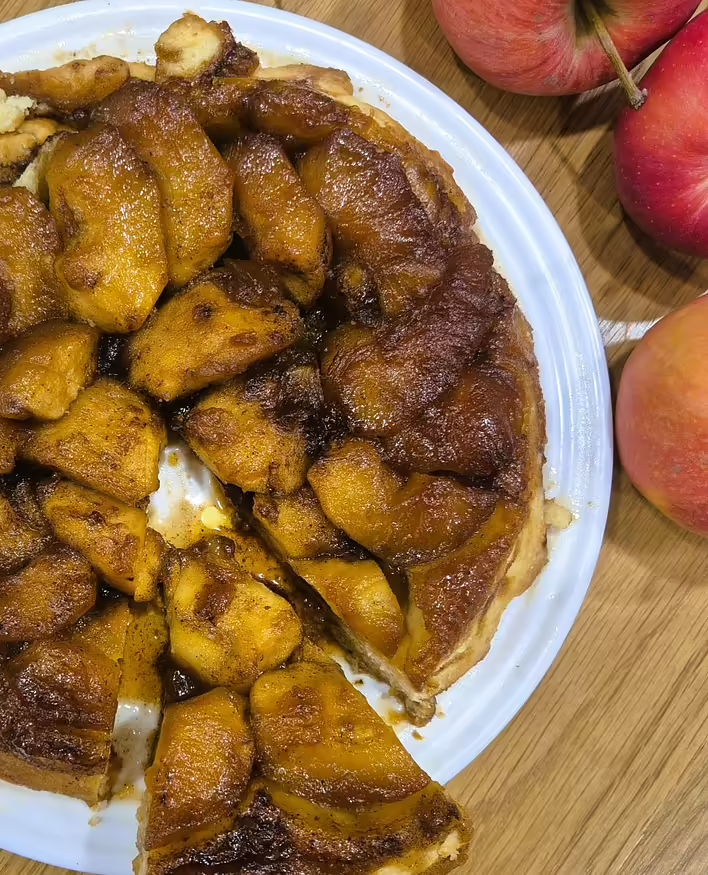
After baking the panettone, which we wrote about here and here, we were left with oranges and lemons without peels (from which we removed the zest), Manitoba flour, a lot of egg whites, and butter. So, we couldn't think of anything better than making a citrus tart with Swiss meringue. We'll tell you and show you how to quickly prepare this delicious dessert ;)
Time required: up to 1.5 hours
Difficulty: 3 out of 5
Number of servings: 8-10
Cost of ingredients: average
We will need:
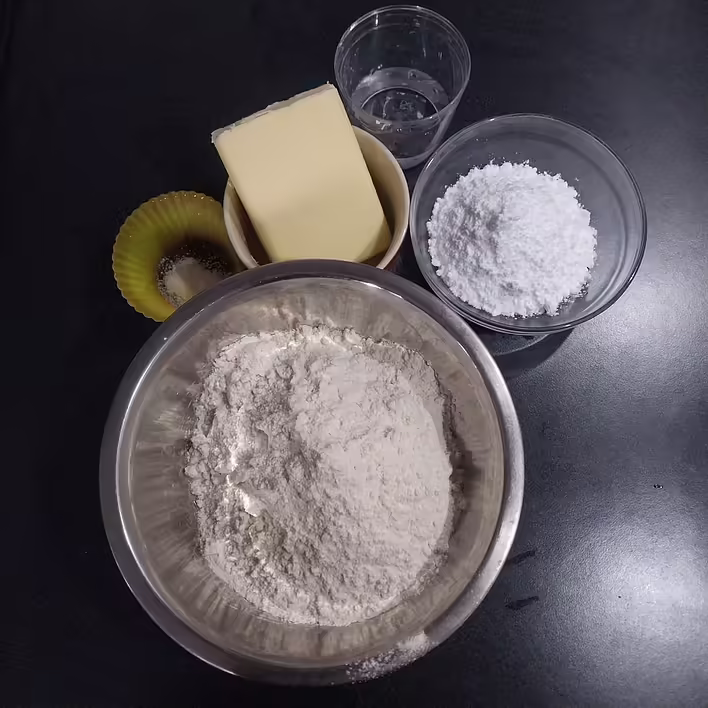
For the shortcrust pastry:
300 g flour
75 g powdered sugar
2 egg yolks (which we successfully forgot to add to the dough)
125 g butter
50 ml cold water
a pinch of salt
набір для пісочного тіста
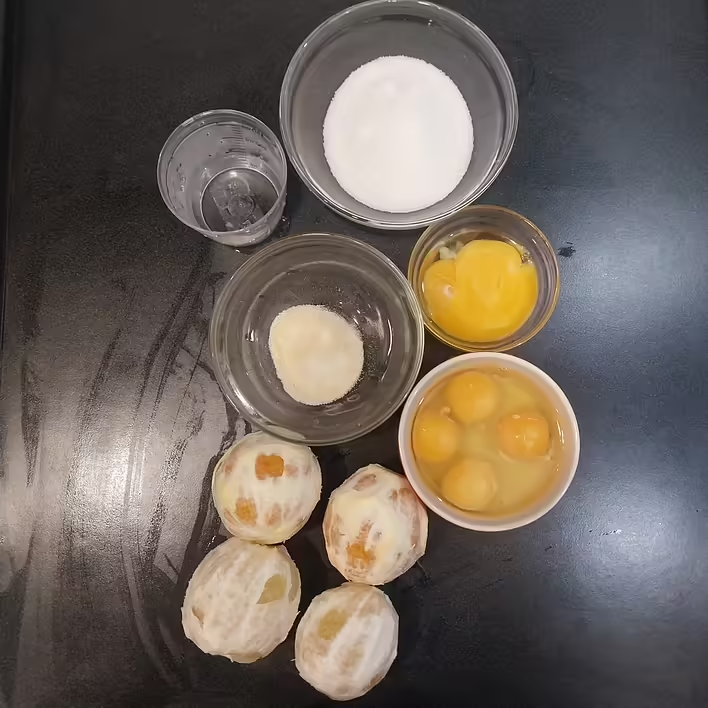
For the citrus curd:
juice from the flesh of two oranges and two lemons
4 eggs
2 egg yolks
120 g sugar
7 g gelatin
35 ml hot water
набір для цитрусового курду
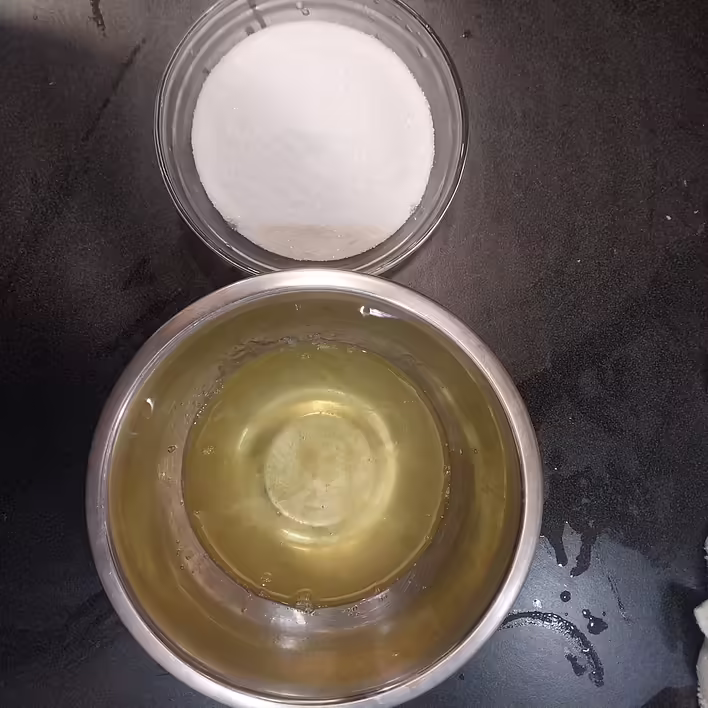
For the Swiss meringue:
6 egg whites (you can use just 4, which remain from the eggs used for the dough and curd)
250 g sugar
набір для меренги
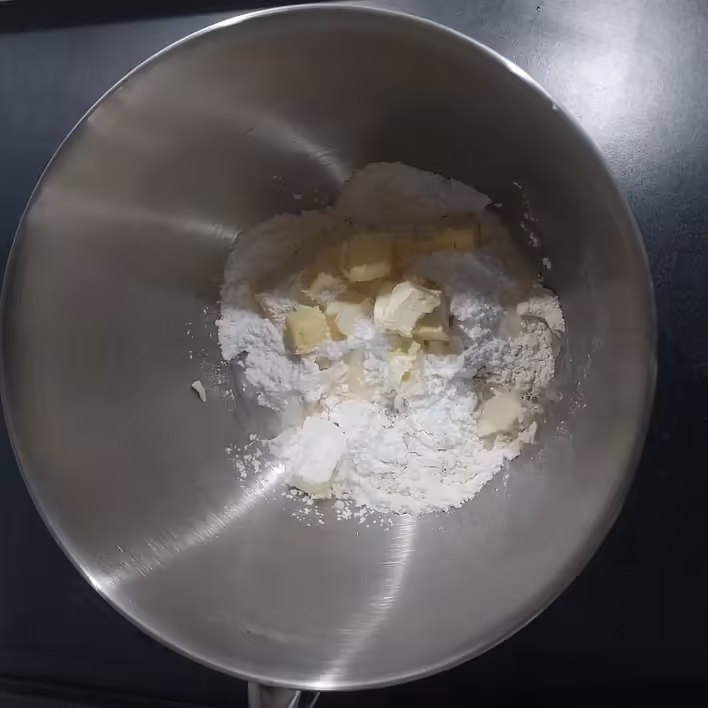
Step 1: prepare the shortcrust pastry
We have already talked about the nuances of kneading shortcrust pastry when we made the “Angel's Tears” cheesecake. But this time we simplified the preparation technology a bit. The result didn't turn out worse (well, maybe a little, because we forgot to add the egg yolks to the dough).
Separate the yolks from the whites. Try to separate them very carefully so that the yolks do not get into the whites (in this case, it will not be possible to make meringue later).
Cut the butter into small cubes. For the dough to knead well, the butter must be at room temperature, that is, soft.
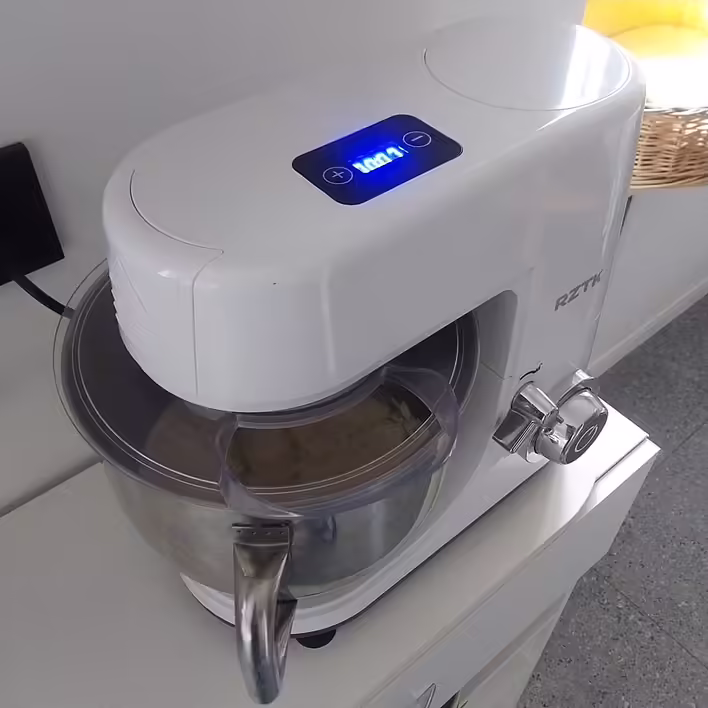
Combine all the ingredients for the dough in the bowl of a food processor, mixing using the hook attachment at low speed. This process took about seven minutes.
жовтки забули додати(
вимішуємо
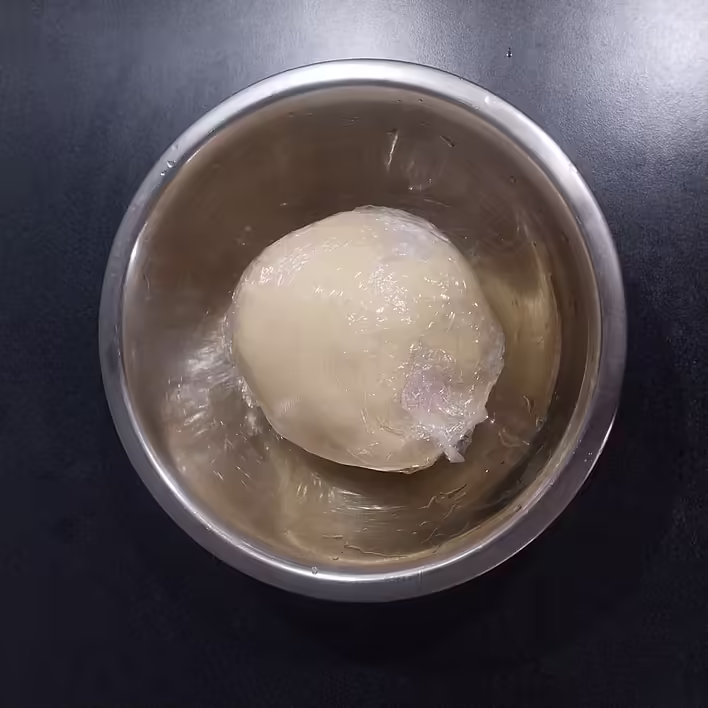
When the dough is mixed to homogeneity – we form it into a ball, wrap it in cling film, and send it to rest in the refrigerator for 30 minutes.
тісто йде відпочивати в холодильник
Step 2: prepare the citrus curd
First of all, we need to squeeze the juice from the oranges and lemons. We used a slow juicer for the food processor, resulting in 385 ml of juice with pulp.You can also squeeze the juice using a special citrus press. We used the devices we have in our kitchen.If you manage to squeeze less than 400 ml of juice – it's not a problem. If the discrepancy is less than 10% of this volume – you can add plain water.
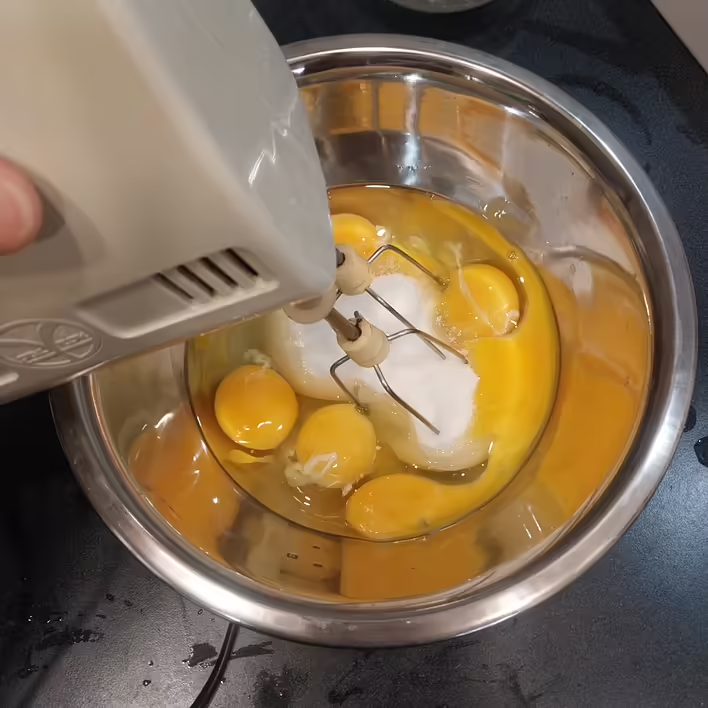
In a bowl, mix the egg yolks, whole eggs, and sugar. You can use either a mixer or a whisk. At this stage, we don't need to beat this mixture too much, the main thing is to thoroughly mix the eggs (so that the yolks combine with the whites).
робимо яєчну масу
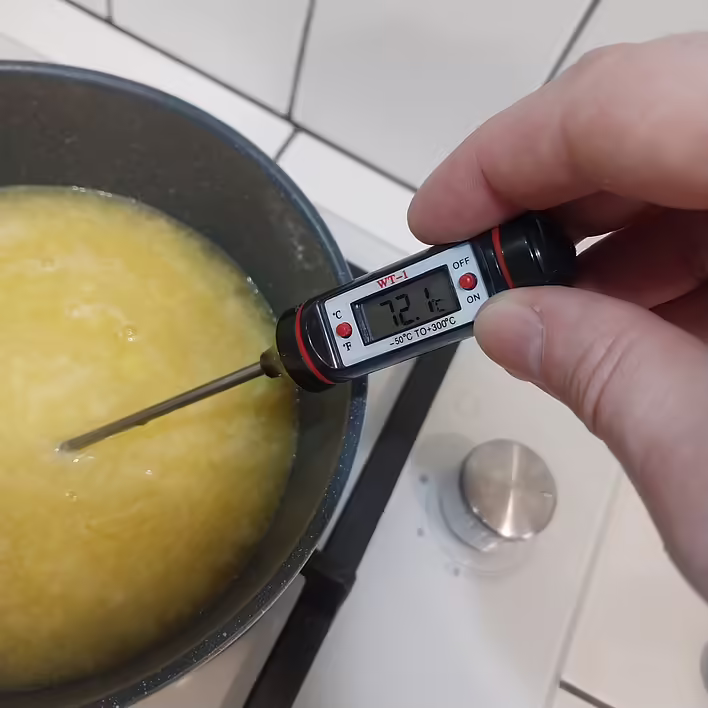
Pour the citrus juice into a saucepan, turn on low heat, and heat to a temperature of 70-75 degrees (we measured with a probe), do NOT bring to a boil. If you don't have a probe – heat until the juice starts to steam.
перевіряємо температуру
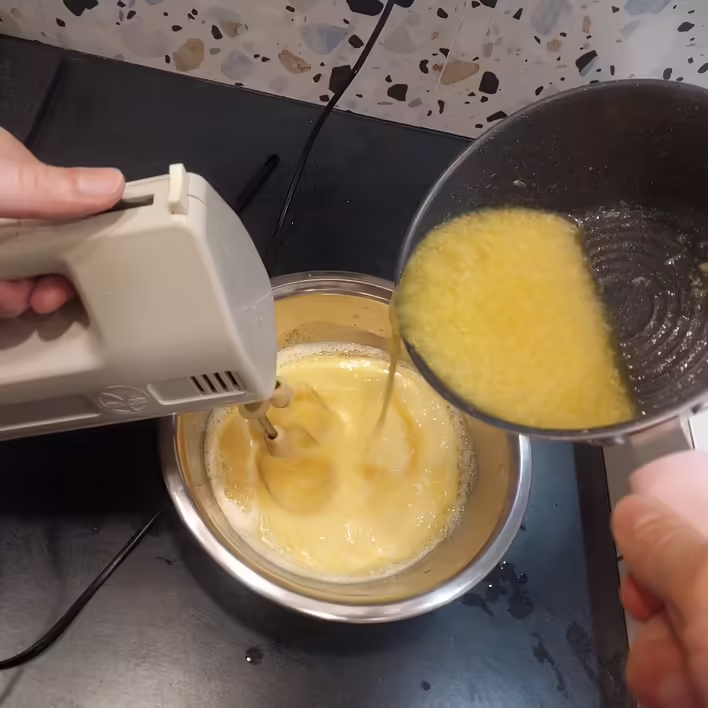
After that, we need to pour the hot juice into the egg mixture and bring it to the most homogeneous consistency with a whisk or mixer.
вливаємо сік та продовжуємо вимішування
In a small container, add 35 ml of hot (but not boiling!) water to the gelatin, mix and let it swell.
During this time, return the egg-citrus mixture to the saucepan and cook it over the lowest heat, constantly stirring with a whisk until it reaches a consistency similar to thick sour cream. Remove from heat.
Проміжний етап приготування курду
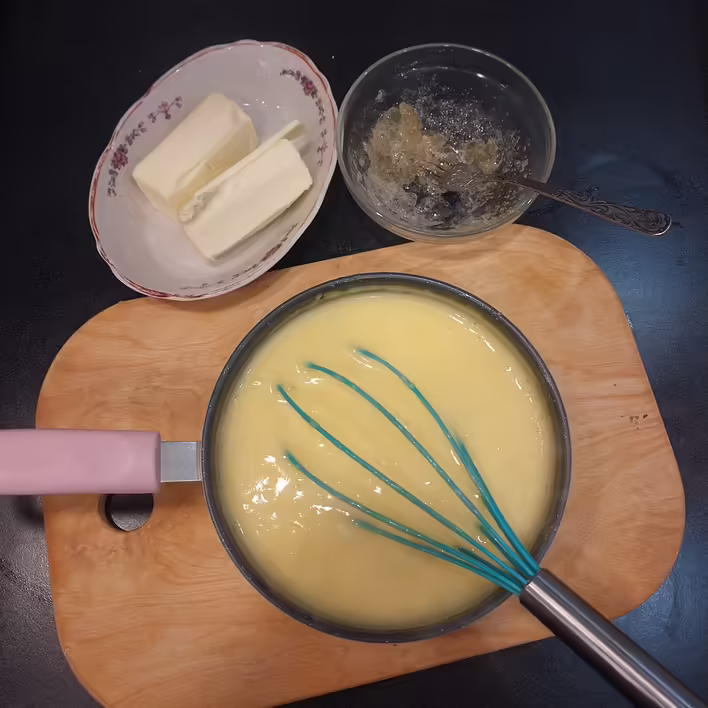
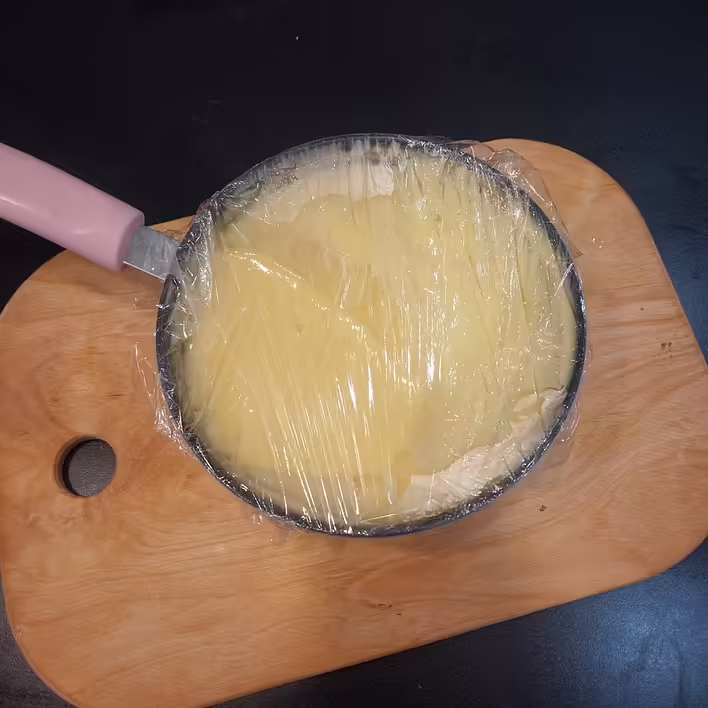
Add the swollen gelatin, mixing it thoroughly until completely dissolved. To this mixture, add the butter, also mixing thoroughly until fully dissolved. After that, cover our curd with cling film (we wrapped the saucepan itself) so that it touches the curd (this is necessary to prevent condensation and the curd from separating). Leave to cool to room temperature.
видно місця, де плівка не прилягає до курду. Не робіть так
Step 3: form the base from the shortcrust pastry
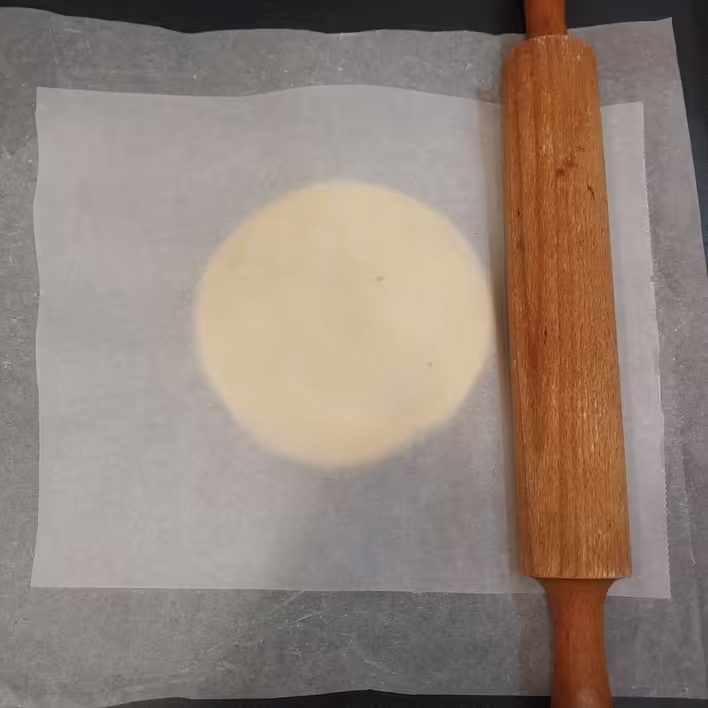
Take the cooled and rested dough from the refrigerator. Place it between two sheets of parchment (we recommend using silicone parchment, the dough does not stick to it). Roll out to a thickness of 3-4 mm, based on the size of the mold in which we will bake the tart.
Початок розкатування
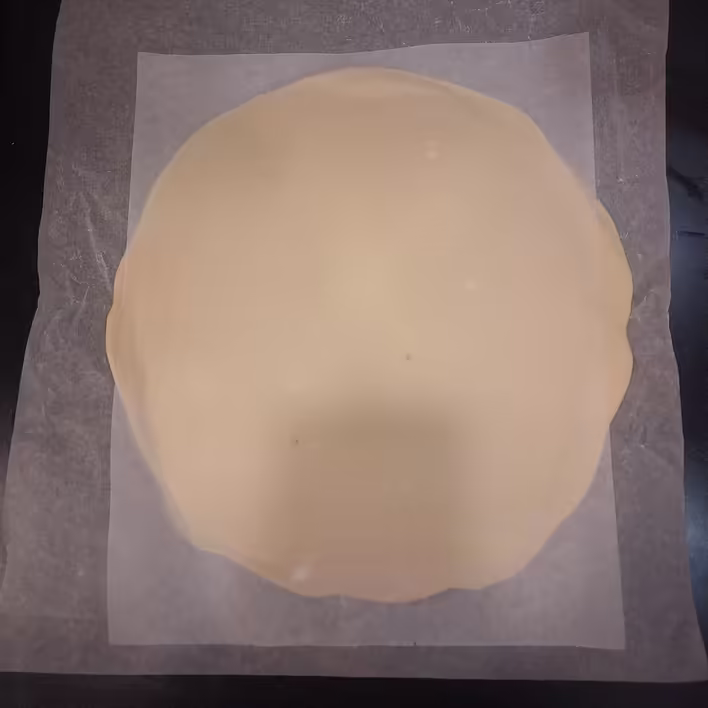
The diameter of our mold is 30 cm, and the height of the sides is 2 cm. Therefore, we had to roll the ball out to a diameter of about 34 cm.
Розкатане тісто
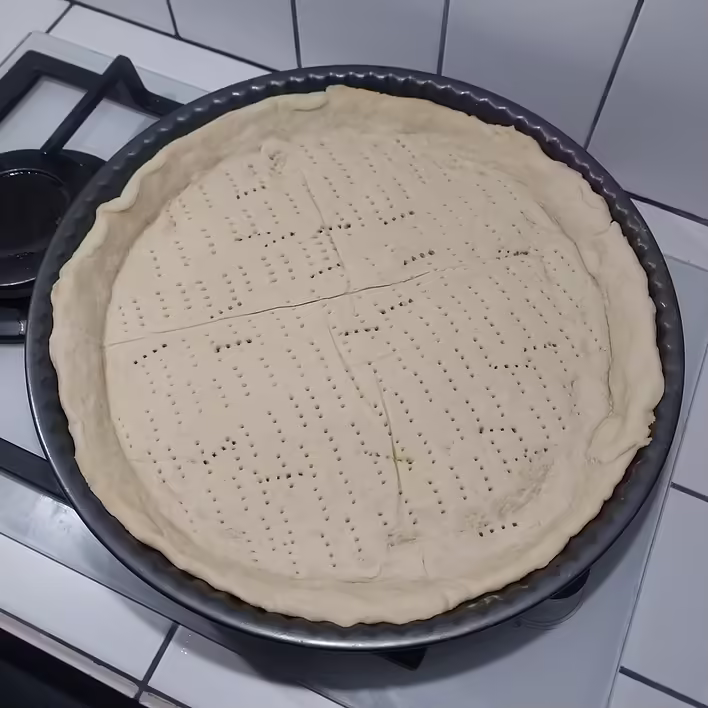
Place the dough in the mold. We previously dusted it with flour. If there are any leftovers on the edges – you can carefully cut them off with a knife.
Викладаємо в форму
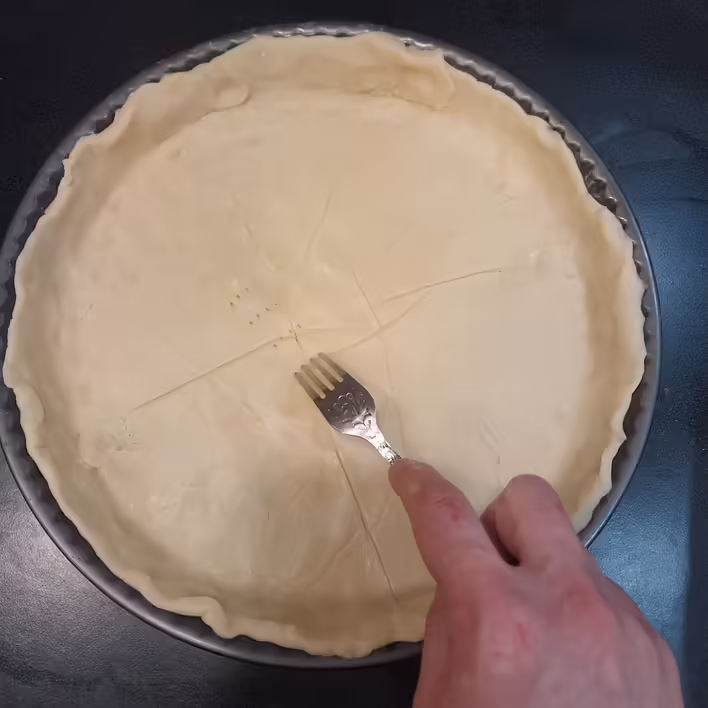
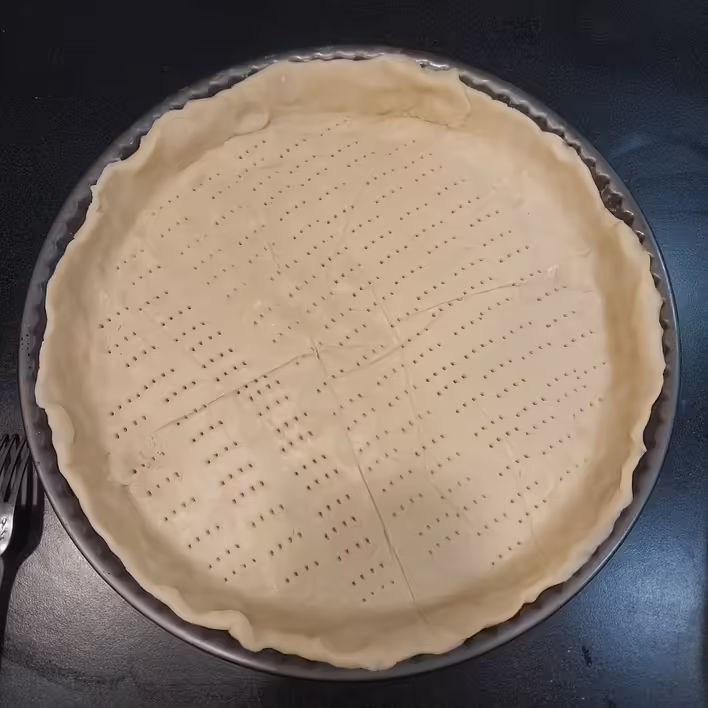
Make holes with a fork all over the surface of the base.
Перфорейшн)
Send the dough in the mold to the refrigerator for another 20-30 minutes.
When the dough has finally finished resting (oh, how lazy!), preheat the oven to 180 degrees, place the mold inside, and bake for 15-20 minutes with both the top and bottom heating elements on in convection mode. Remove from the oven and let cool to room temperature.
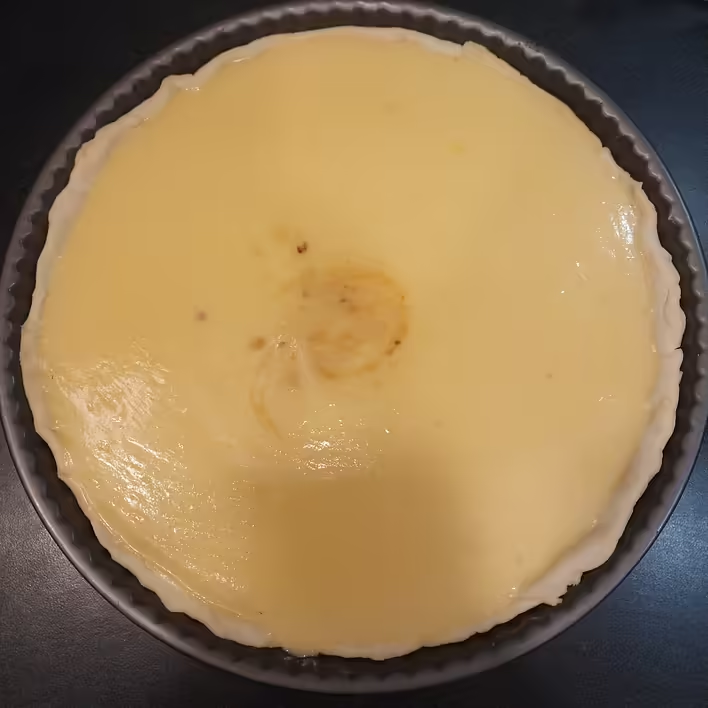
Після випікання. Пісочна основа готова
Step 4: assemble the tart
During the time the dough was busy with important matters (resting and cooling), the citrus curd also cooled. We spread it into the baked base and let them rest together. In the refrigerator. For 20 minutes.
Гоу в холодильник
Step 5: prepare the Swiss meringue
20 minutes while the tart rests in the refrigerator is enough for us to prepare the Swiss meringue.
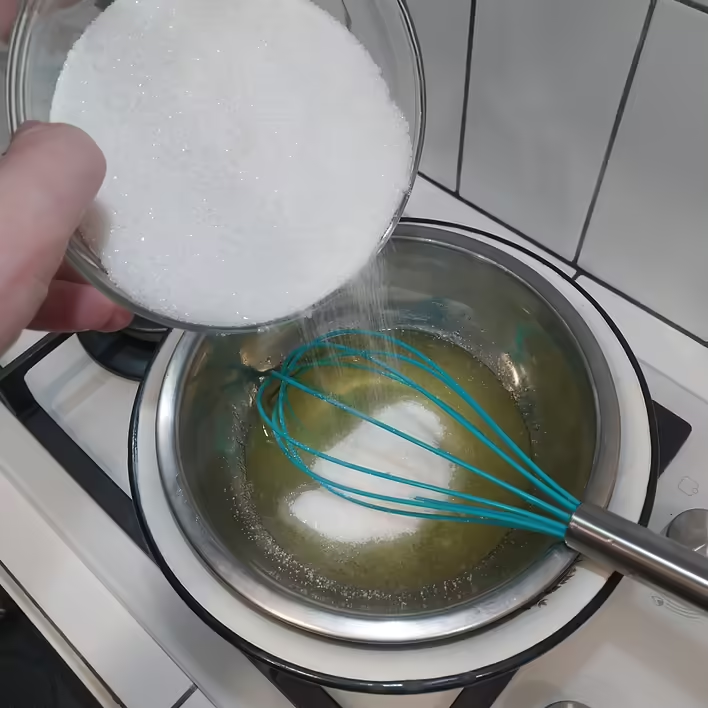
For this, you need to place the egg whites with sugar in a metal bowl (or another heat-resistant container), and place the bowl in a larger bowl with hot water.
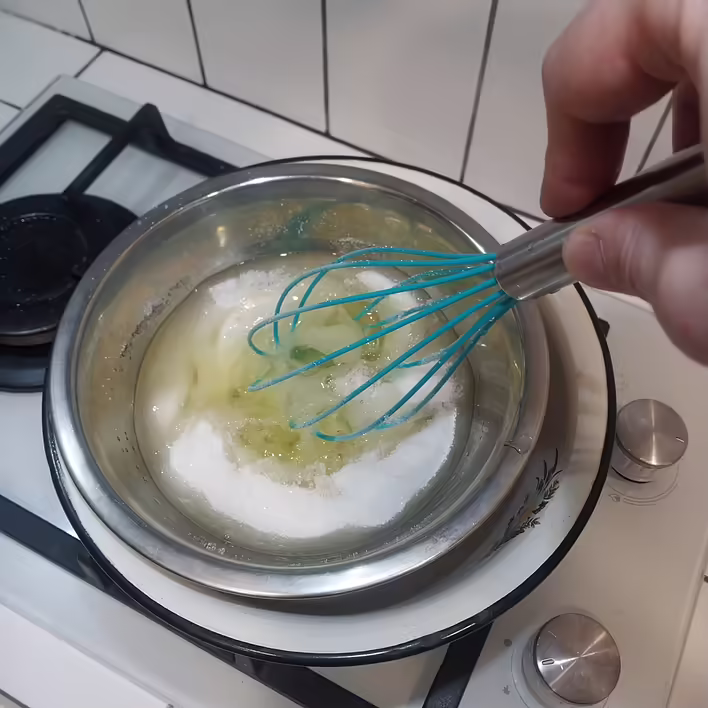
Водяна баня готова. Додаємо до білків цукор
Place this water bath on the stove, turn on the heat. The intensity – medium.
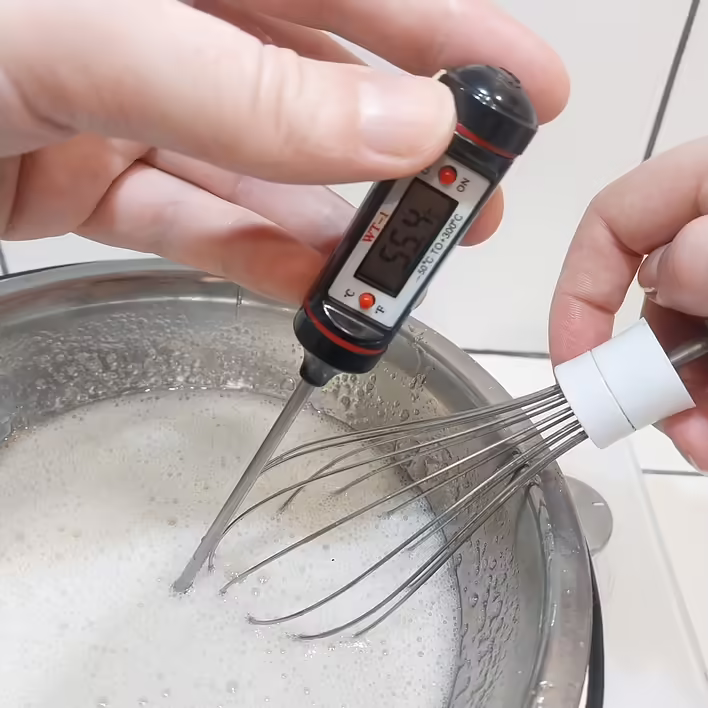
With one hand, constantly whisk the mixture, while with the other, use a thermometer to measure the temperature of the mixture.
Інтенсивно працюємо вінчиком
As soon as it reaches the interval of 50-55 degrees (we overheated by 0.4 degrees), remove it from the heat.
Троооошки перегріли
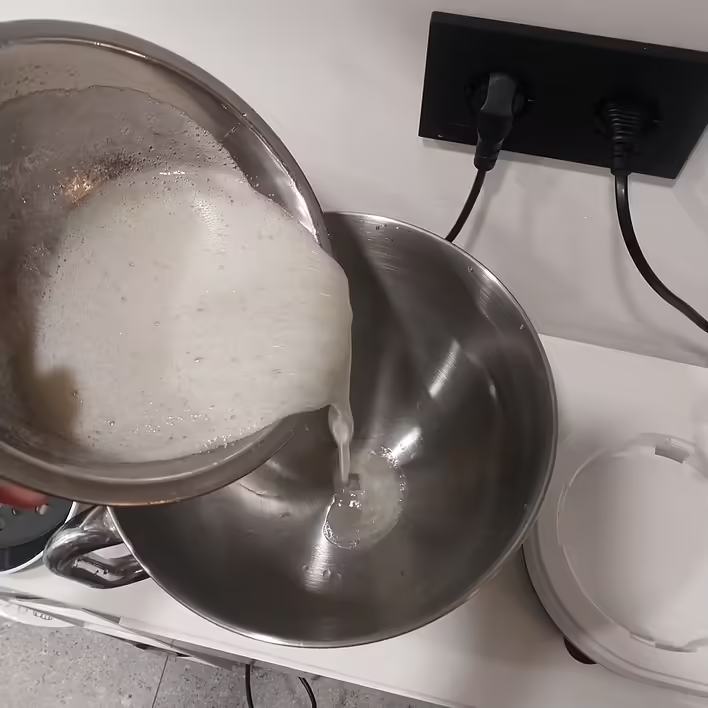
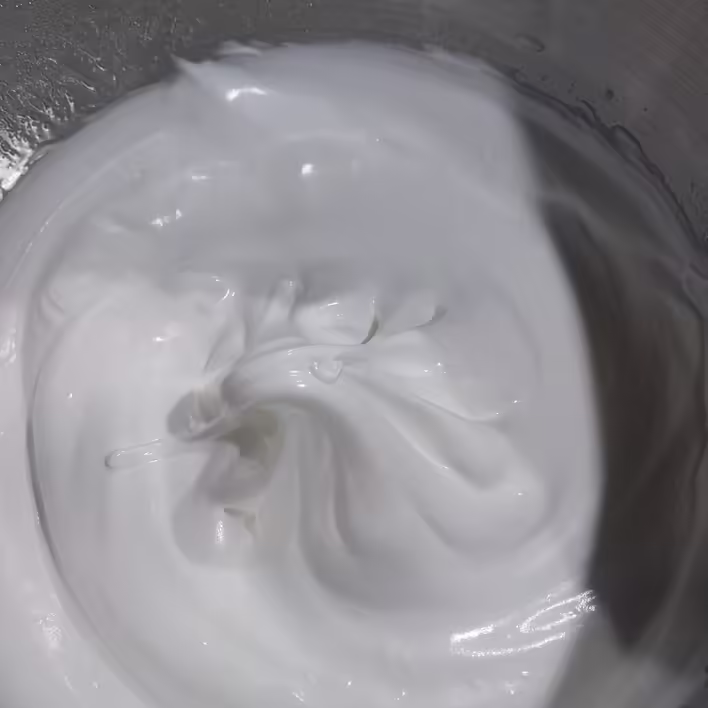
Pour the egg mixture into the bowl of the food processor, attach the whisk, and beat at high speed for 7-10 minutes until stiff peaks form.
You can also use a mixer. Stiff peaks are the stage of the egg whites when they have increased in volume, acquired an “airy” texture, hold their shape, and do not collapse. You can perform a simple test: turn the container upside down in which you are beating them. If you did everything correctly – they will not fall out. We tried, and it worked ;)
Заливаємо суміш в чашу комбайна
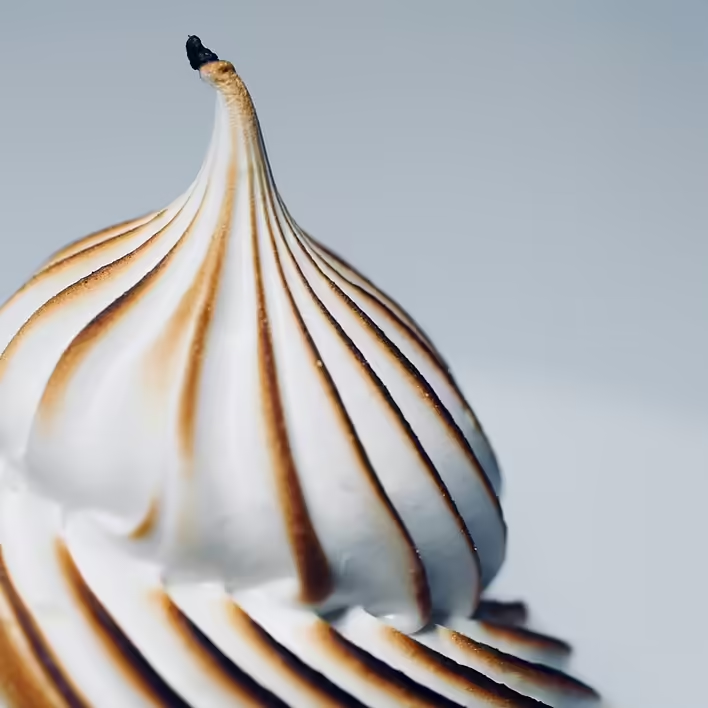
Швейцарська меренга готова
This stage is the recipe for making classic Swiss meringue.
Step 5: bake the tart
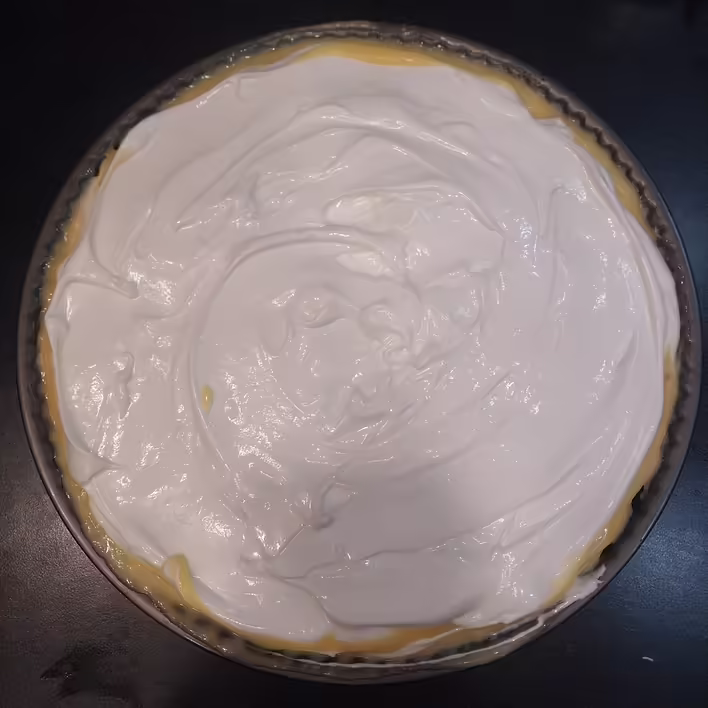
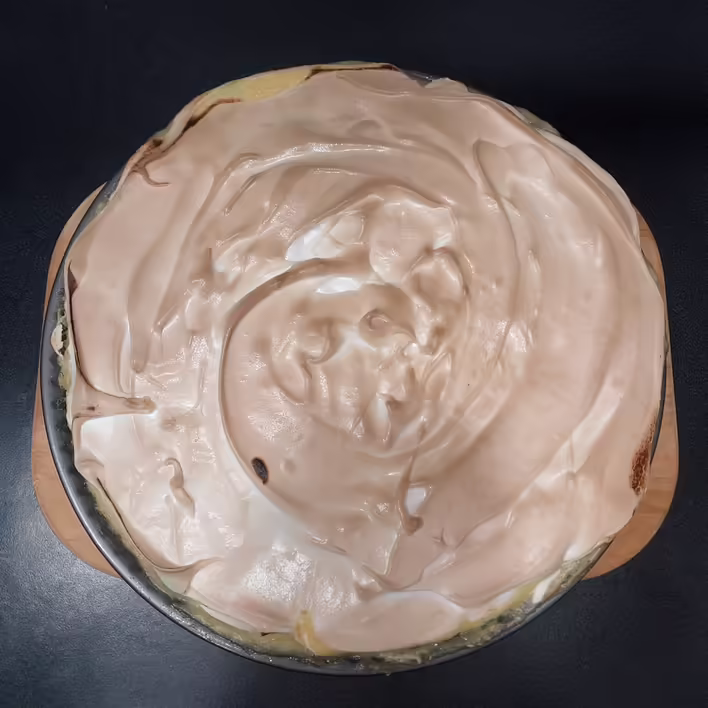
Take the tart out of the refrigerator and carefully spread the meringue on top. Using a silicone spatula or spoon, create a wave pattern. Or don't. In short, there is room for creativity here.
Викладаємо на тарт меренгу
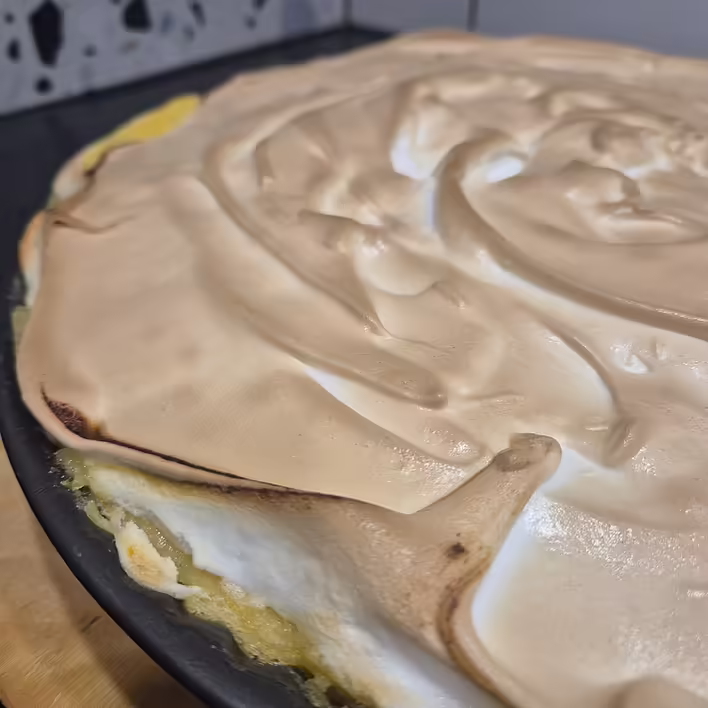
Preheat the oven to 210 degrees and bake the tart for literally 3-5 minutes: until the meringue turns golden. But do not let it burn.
Чорна пляма - це ледь підгорівший курд
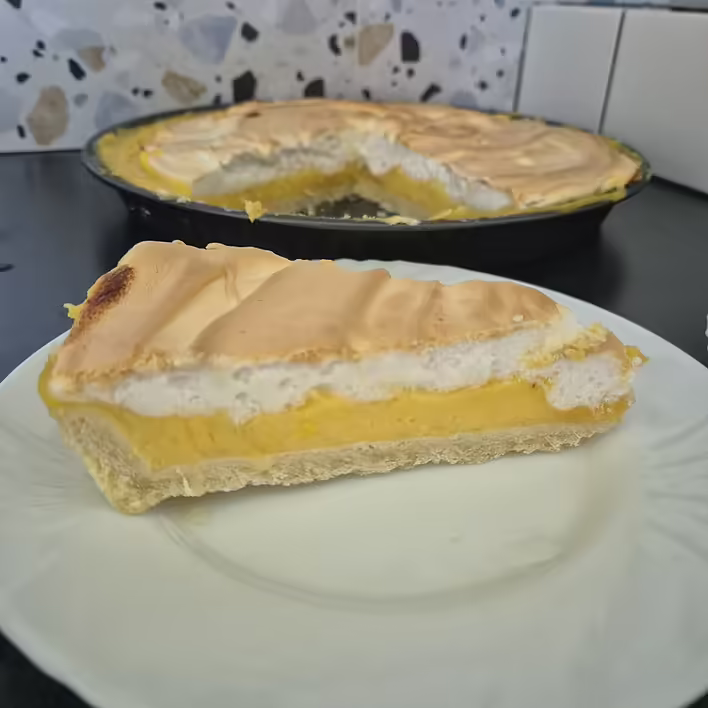
Congratulations, the citrus tart is ready! Enjoy! ;)