This time we decided to prepare a classic dish of Mexican cuisine – chili con carne. Translated from Spanish, it literally means “chili with meat.” The cooking technique and the set of ingredients are quite simple, which is why we chose to make this dish for dinner.
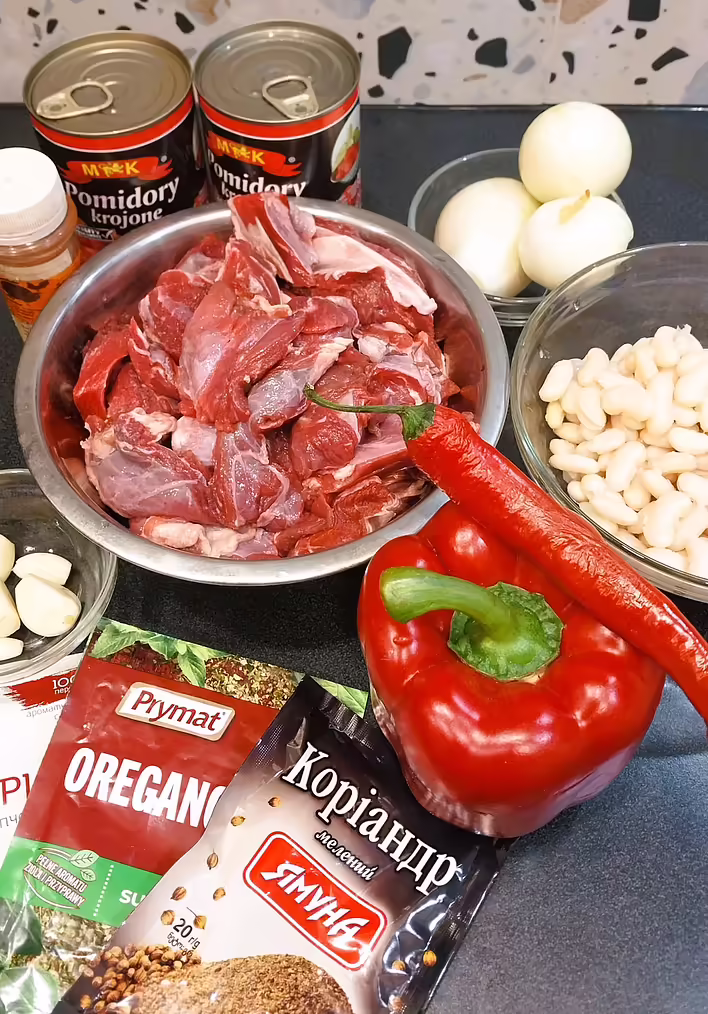
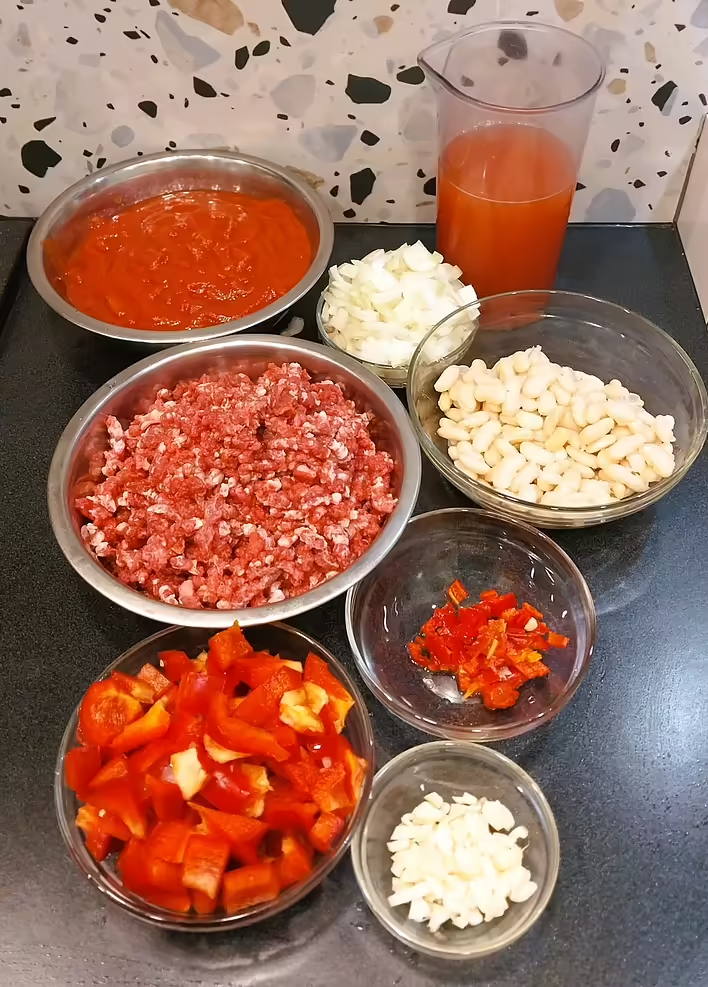
We will need:
Beef - 1 kg
1 bell pepper (weight about 340 g)
Onion - 3 medium-sized
Garlic - 5 cloves
Beef broth or water - 300 ml
Canned tomatoes - 2 cans
Cooked beans - 250 g (you can use any canned beans, or skip them altogether, as they are an optional ingredient)
Salt
Smoked paprika - 3-4 tbsp.
Oregano - 1 tsp.
Ground red chili pepper - 0.5 tsp. (this should be enough, as the dish should be spicy, but the amount can be adjusted according to personal taste)
Hot red pepper - 1 piece
Cumin - 1 tsp.
Ground coriander - 1 tsp. (if you have whole, you can grind it in a mortar)
Black pepper - 0.5 tsp.
A small amount of oil for frying (we used a mix of olive and sunflower oil).
продуктовий набір
Step 1: Preparing the ingredients
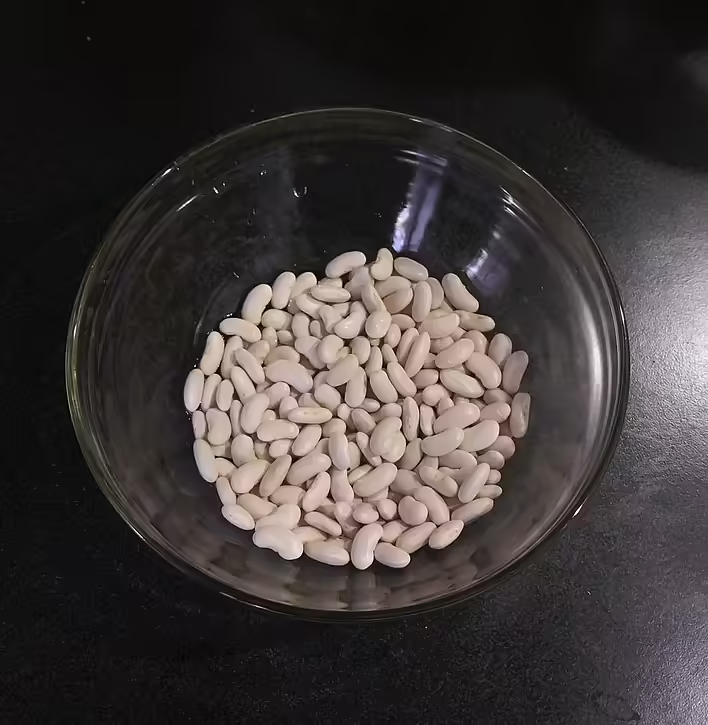
First of all, we decided to prepare the beans. We soaked 100 grams of beans in 200 ml of cold water in the morning and left them for 6 hours.
так виглядає 100 грам квасолі
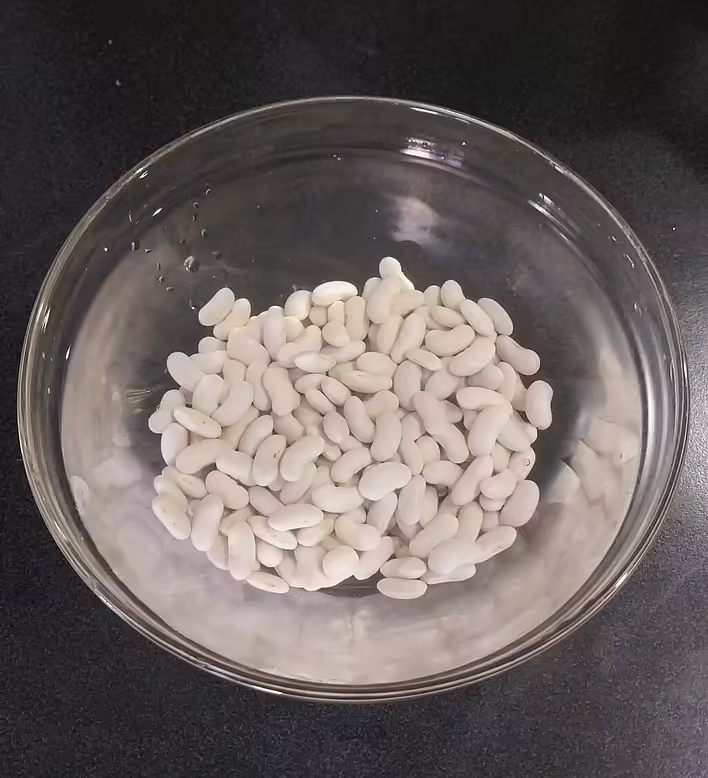
заливаємо квасолю водою
The beans will absorb the water and significantly increase in volume. The water they were soaked in should be drained and the beans rinsed. After that, we poured them with clean water in a 1 to 2 ratio, added a teaspoon of salt, and boiled for about 1 hour, until the beans were almost fully softened.
If you don’t want to deal with this step – you can safely skip it, as we mentioned above, beans are not a mandatory ingredient in the dish. Or you can replace them with canned beans.
We cut the beef into small pieces. We grind it using a meat grinder with a coarse sieve.
For chili con carne, you can also finely chop the meat, but it would take much more time. With the help of a food processor, we spent less than 4 minutes to grind 1 kg of meat.
We chop the onion and garlic. We cut the bell pepper into cubes about 1 cm. The hot pepper is chopped finer.
You can use either canned tomatoes or fresh ones. For fresh tomatoes, you need to make a cross-shaped cut on the side of the stem, pour boiling water over them for a few minutes, dip them in cold water, peel them (this process is called blanching), and cut them into cubes about the same size as the bell pepper.
подрібнені інгредієнти
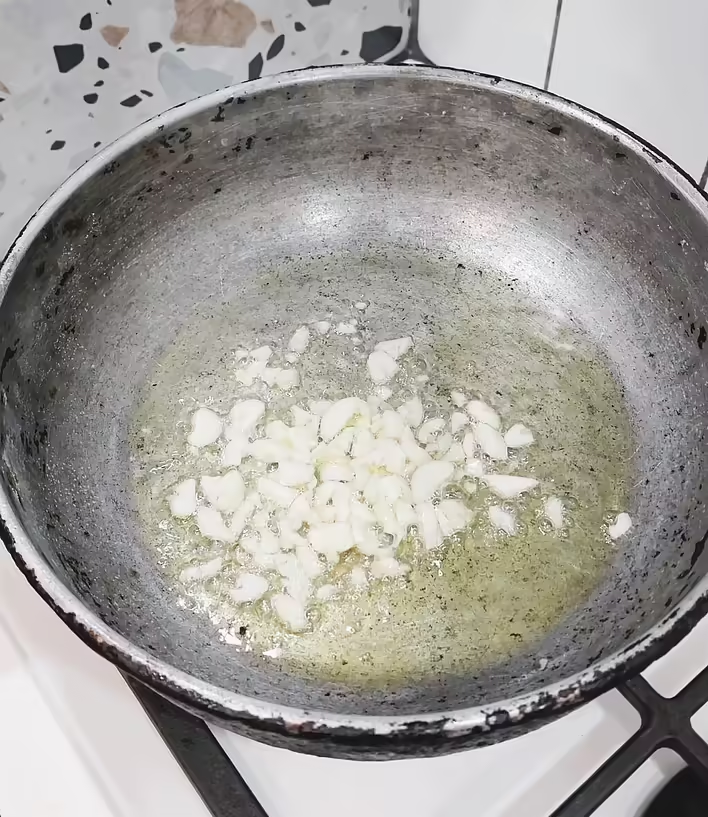
Step 2: Cooking
When we have prepared all the ingredients, it’s time to heat the pan, add a few tablespoons of oil, and start cooking.
When the pan is evenly heated, we set the stove to medium heat and add the garlic, frying it for about 30 seconds.
додаємо часник
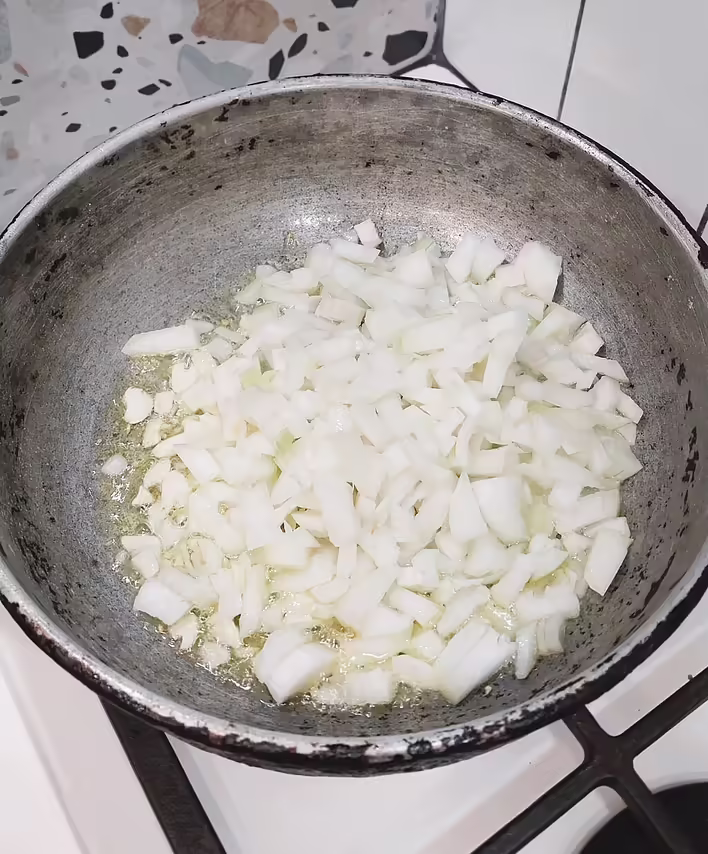
We add the onion and fry it until it becomes translucent.
додаємо цибулю
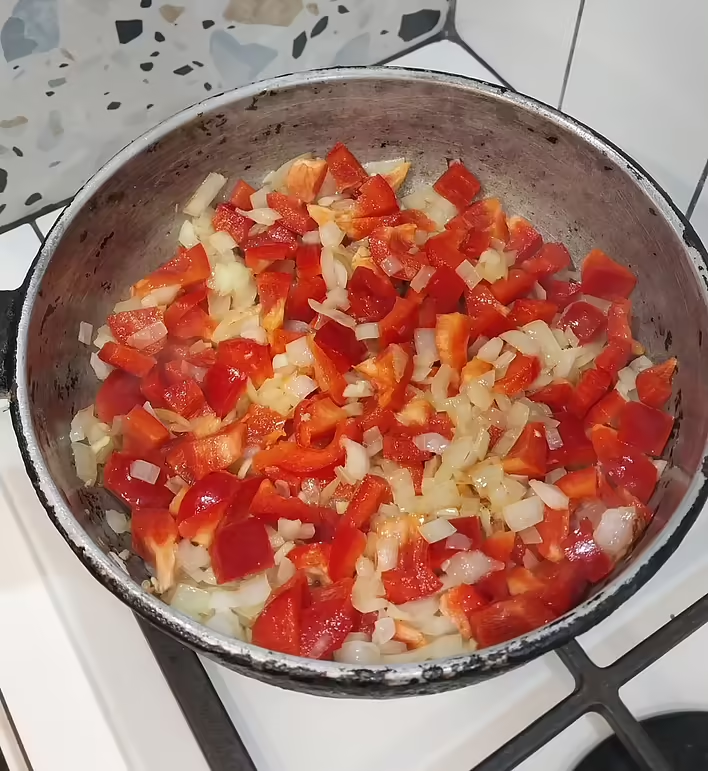
We add the bell pepper and fry the vegetables for 7-10 minutes, regularly stirring with a spatula.
These steps are very similar to preparing the filling for Empanada and basmati rice with seafood, which we have cooked before. Therefore, during cooking, we had a feeling of déjà vu (we’ve done this before!)
додаємо перець
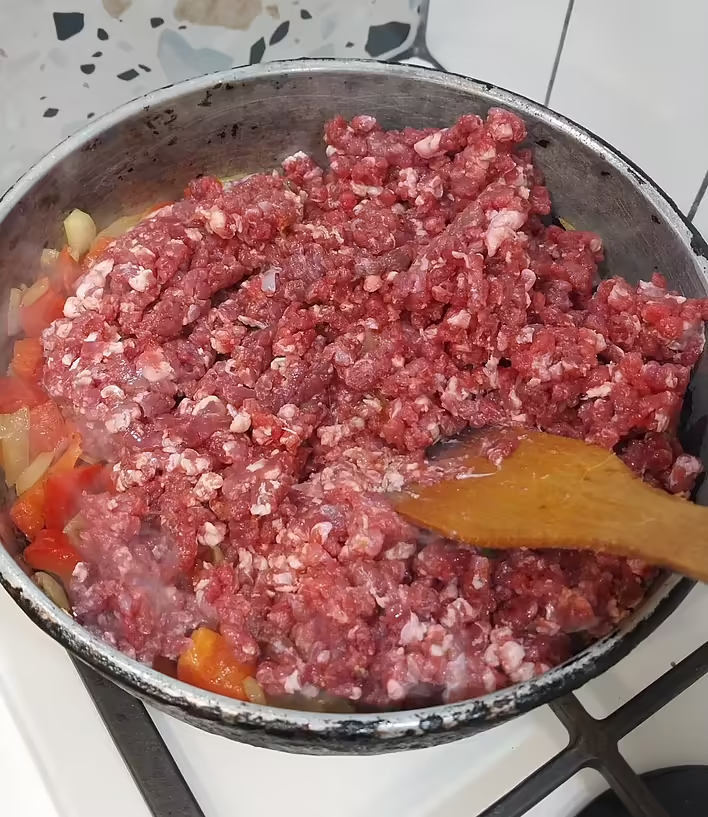
When the bell pepper becomes softer, it’s time to add the minced meat. It should be constantly broken up with a spatula until it is evenly mixed with the vegetables.
перемішуємо лопаткою фарш
When we have thoroughly mixed the minced meat, it’s time to add the spices and salt. At this moment, the kitchen will be filled with fantastic aromas!
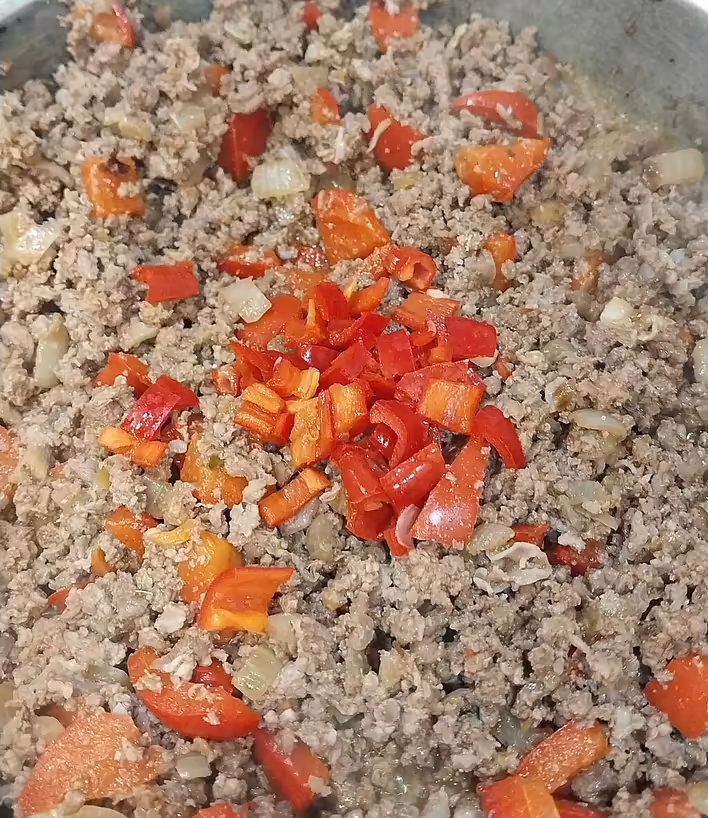
We fry the meat until the excess moisture evaporates and it starts to brown. This is a sign that it’s time to add the hot pepper and tomatoes.
вводимо томати
вводимо гострий перець
We cover the pan with a lid, reduce the heat, and let it simmer for about 20 minutes to allow all the flavors to meld together.
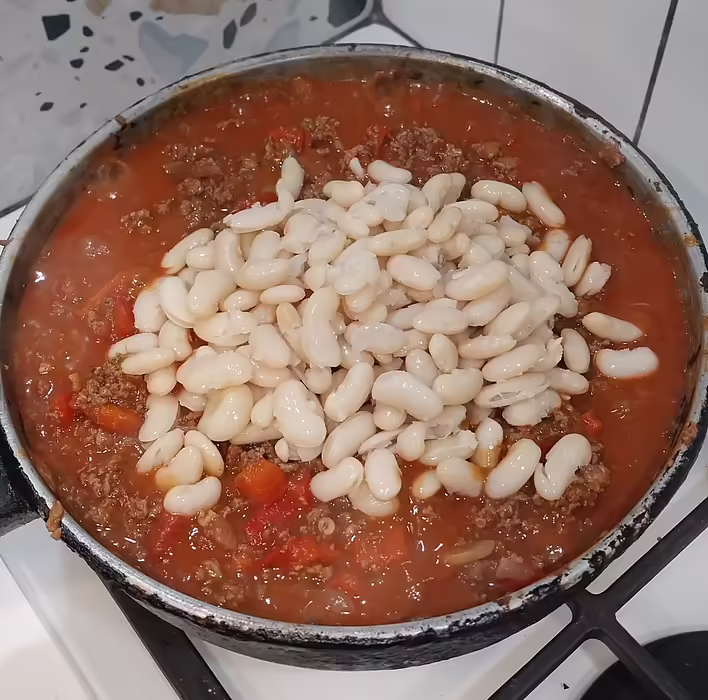
We add the beans, if necessary - add more water, taste for salt and spices. If needed and desired – adjust the spiciness by adding chili powder.
додаємо квасолю
We cover the pan again with a lid and simmer on the lowest heat for at least an hour and a half.
Step 3: Tasting
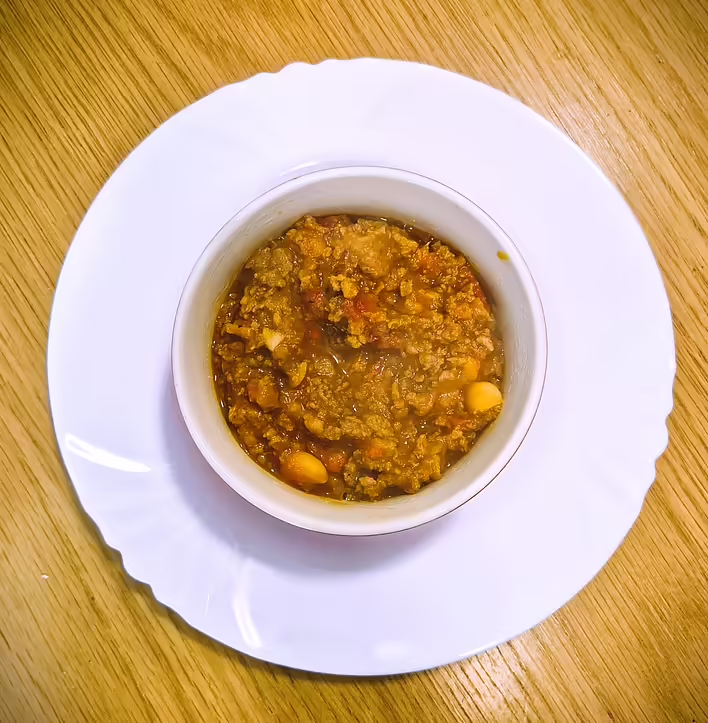
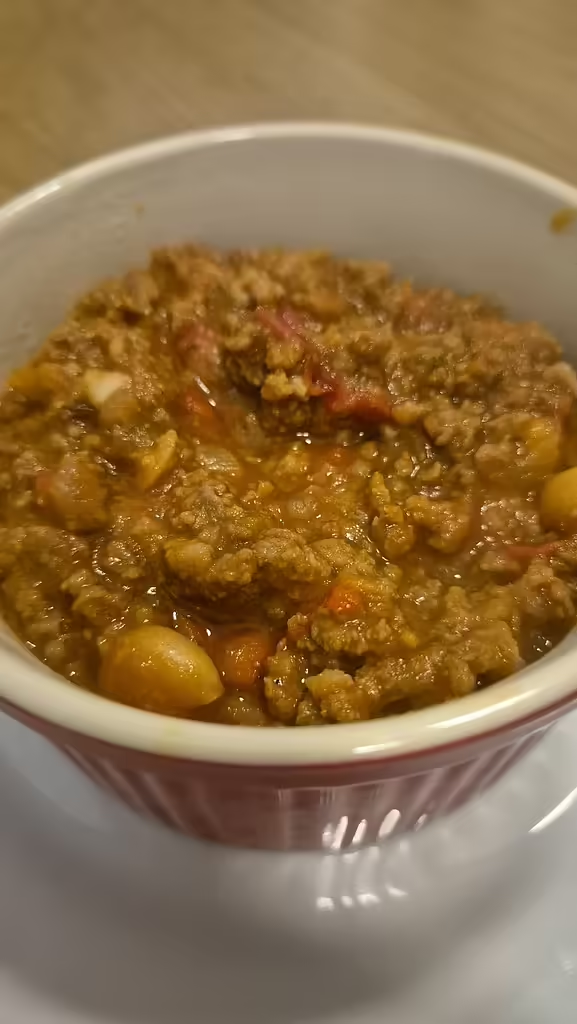
Chili con carne can be served as a standalone main dish or with nachos, tortillas, or rice.
Our verdict: the dish surprises with new flavors and spiciness. It takes about 3 hours to prepare. If you want to cook the beans yourself - you can do it the day before.
чилі кон карне зблизька
So, as always, enjoy your meal!
результат нашої праці
If you like our posts and recipes – you can always support our blog on the Buy Me a Coffee service. Your donations will inspire us to create new and useful Ukrainian-language content. We will be able to buy new ingredients, devices, and interesting cookbooks. This will allow us to regularly adapt recipes for easy and understandable cooking at home. Or you can simply share this post on social media, which will also help the Tseivo platform to grow ;)